Prepare for Your Video Visit
Step-by-step guide to having an amazing experience
Here’s a list of steps to help you get started:
1. Check your internet connection, device and browser.
Please make sure to have a strong Wifi or 4g connection for high quality video streaming. You can have the visit either on a phone (Android/iOS) or computer (Windows/MacOS) with a functioning camera and a microphone. Please make sure to use one of the following supported browsers:

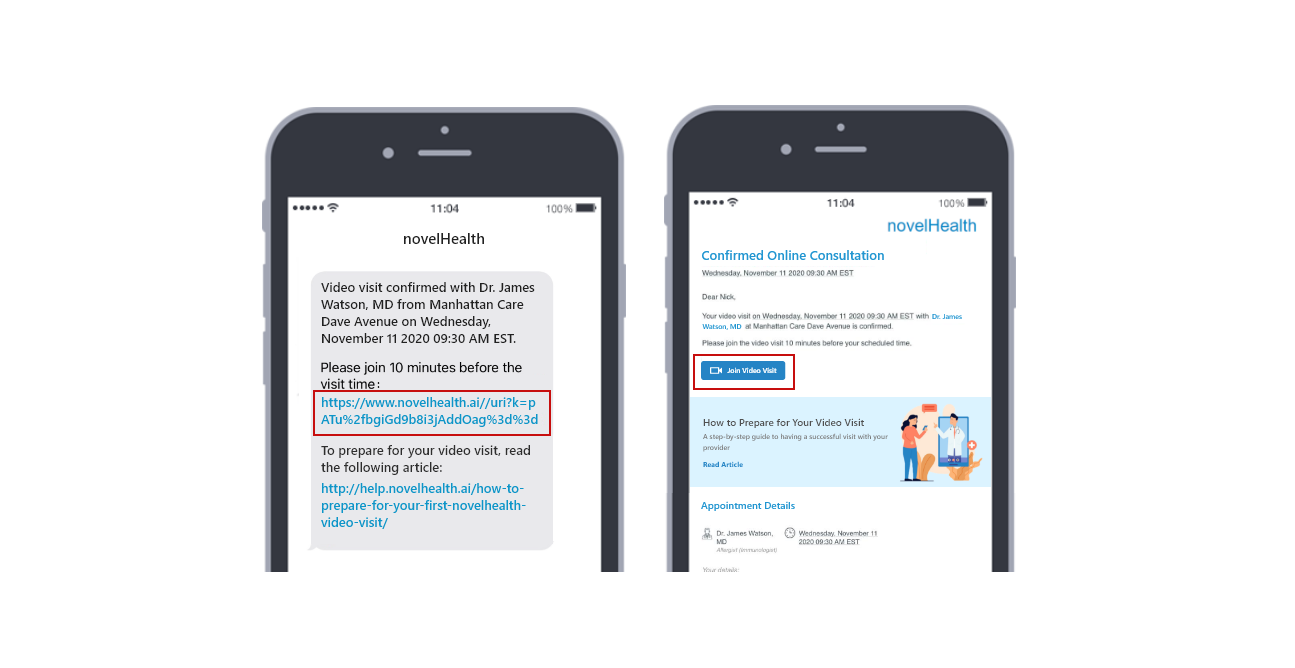
2. Click the visit link that you received via text or email, 10 minutes before your visit time.
Launch the video by either clicking the link that was texted or by clicking the Join Video Visit button in the email as shown below.
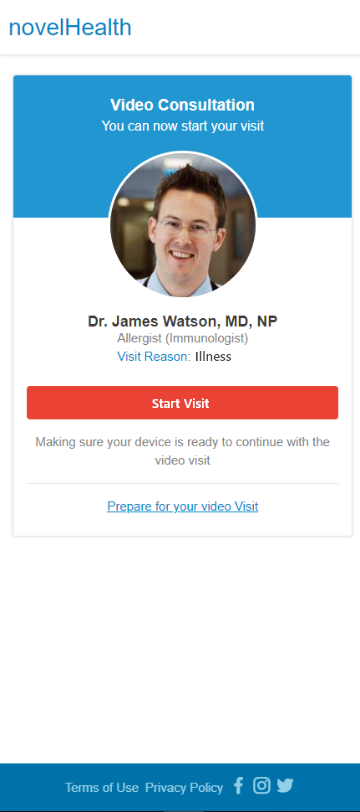
3. After clicking the link or the Join Video Visit button, you will be rerouted to your provider’s waiting room.
Once in the waiting room, click the Start Visit button to launch the video visit.
It is encouraged to join the visit 10 minutes prior to your appointment time. Please note that the button for Start Visit will only be enabled 1 hour before the scheduled appointment time. The button will appear disabled if you attempt to start the visit before that.
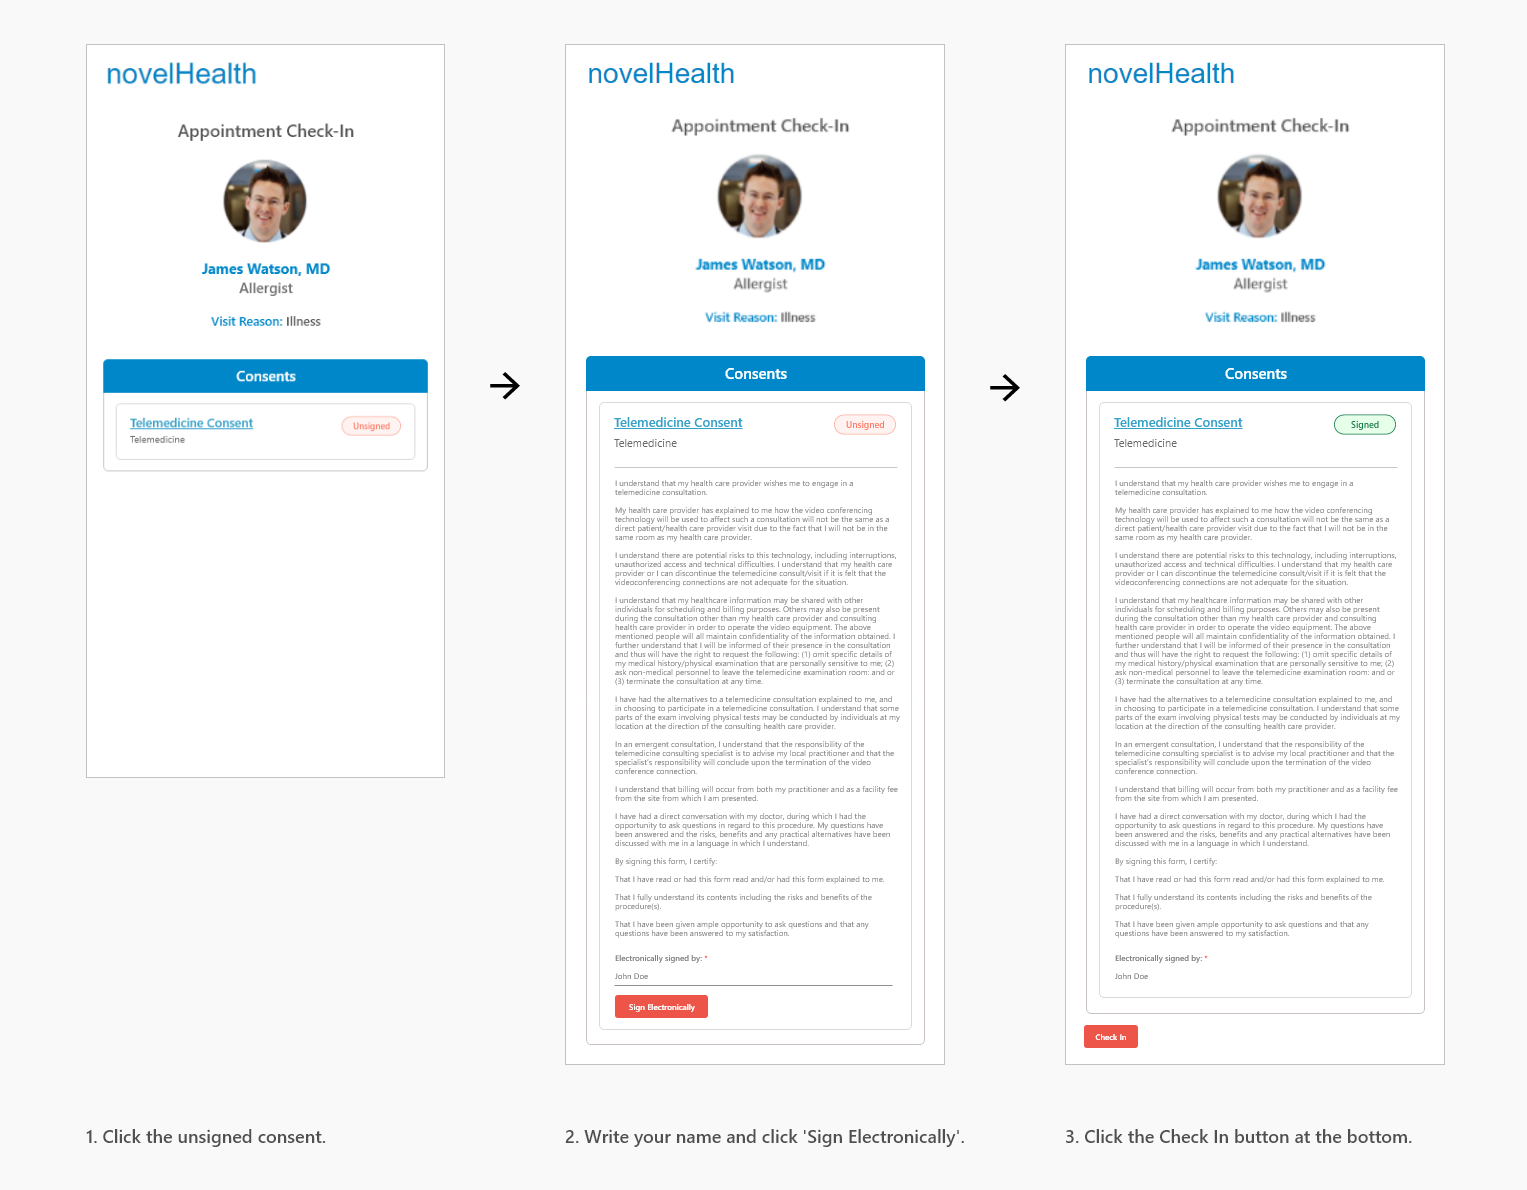
Your provider might need you to sign consent forms to dispense care. Once you have signed, you’ll be able to check into the provider waiting room.
4. Please wait for your provider to join you.
Your provider will be notified once you’ve started the video visit and will join you at the scheduled time. During this time, you can message them in case you like to reach them.
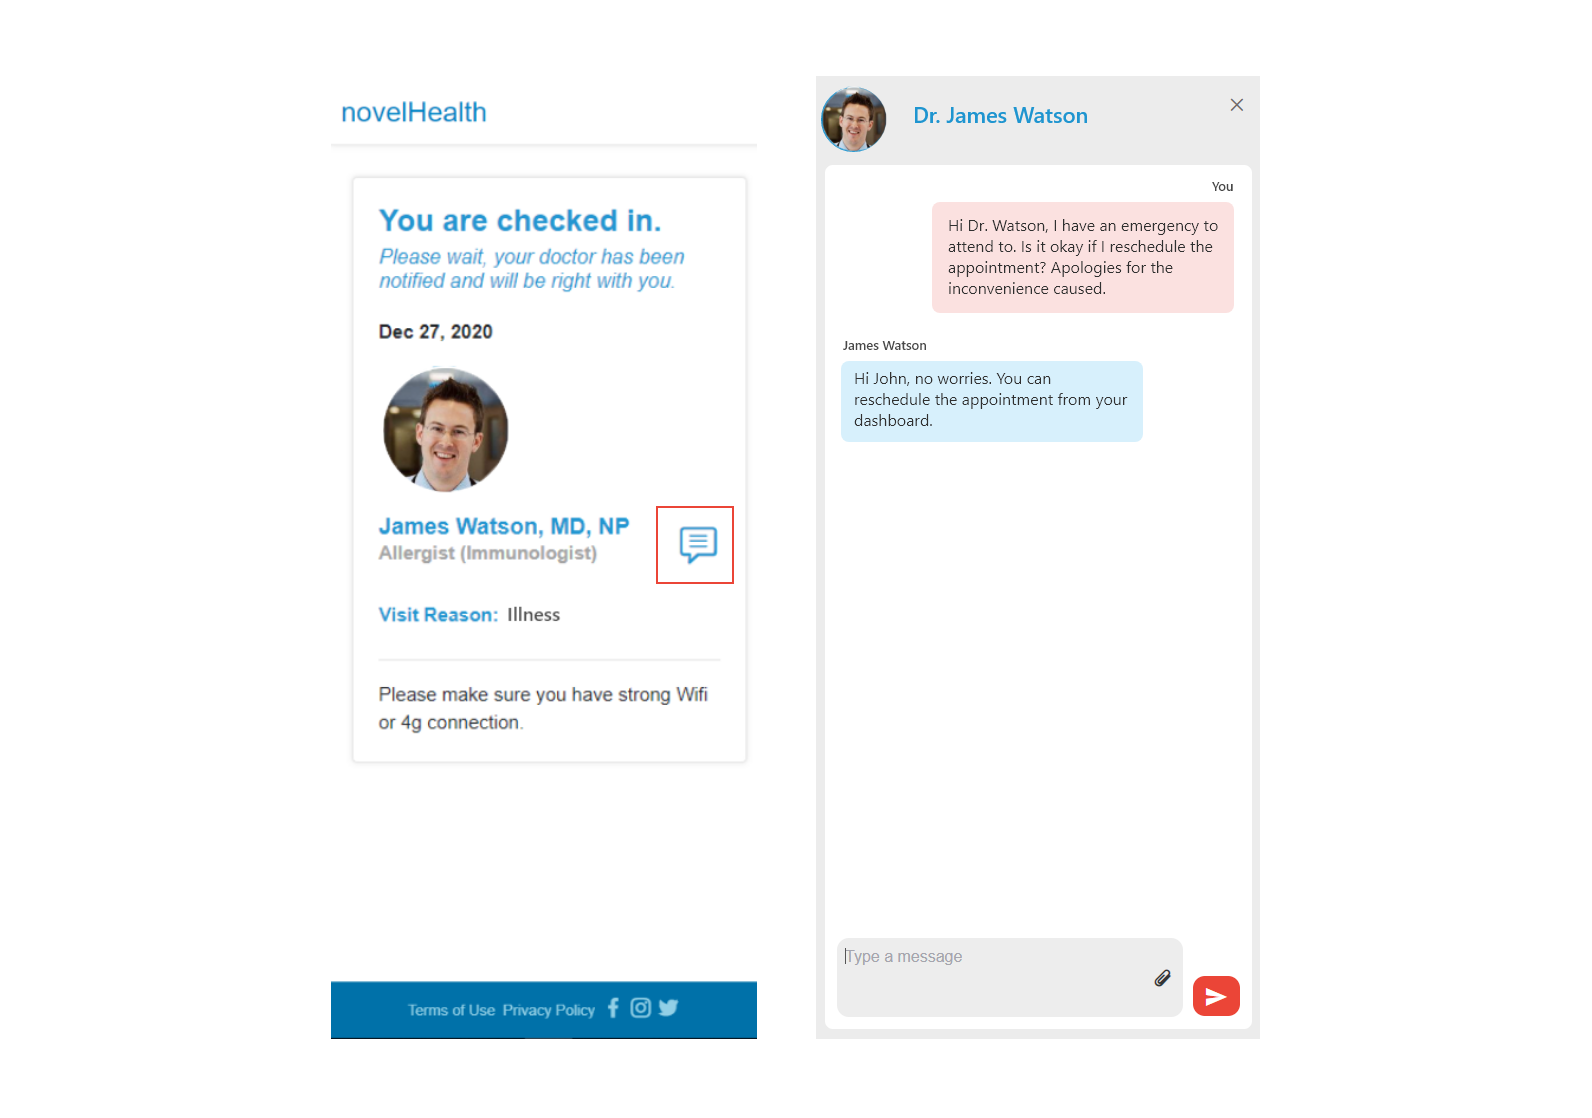
5. Allow access to your camera and microphone.
When your provider joins the video visit, you will be prompted to enable your camera and microphone. Please be sure to select Allow.
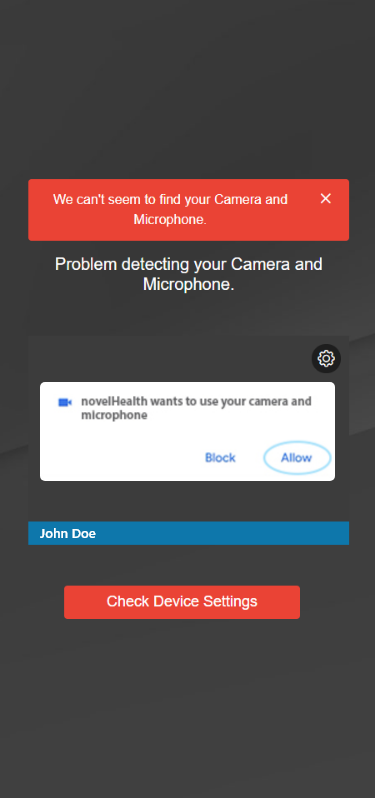
If you face any issues allowing access to your camera or microphone, please read Allow Access to Camera/Mic: All Browsers and Operating Systems.
6. Click ‘Ok, I’m ready’.
When your device’s camera and microphone have been detected, you will be shown your video preview. Click ‘Ok, I’m ready’ when you’re all set to enter the meeting.
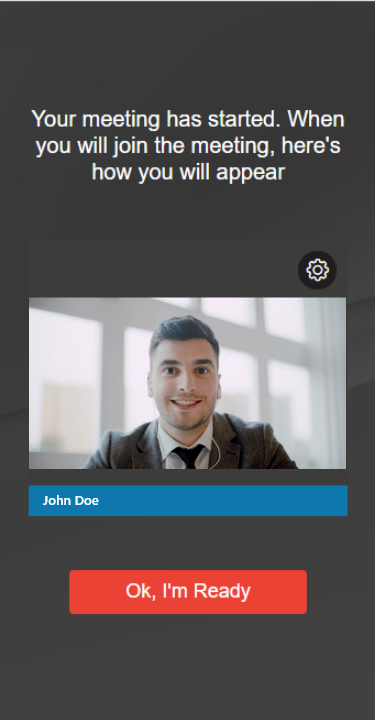
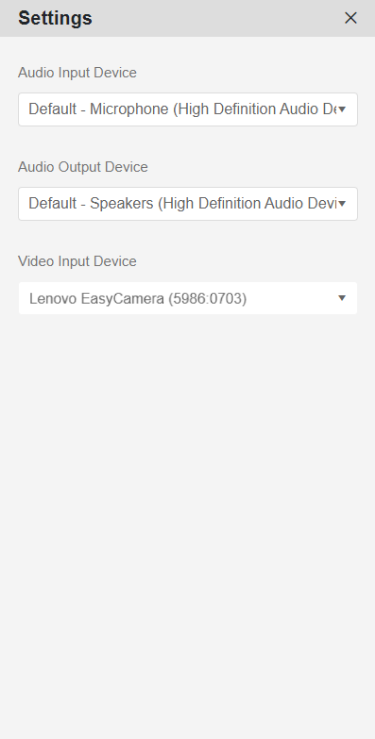
You can also check your device settings by clicking settings on the preview screen.
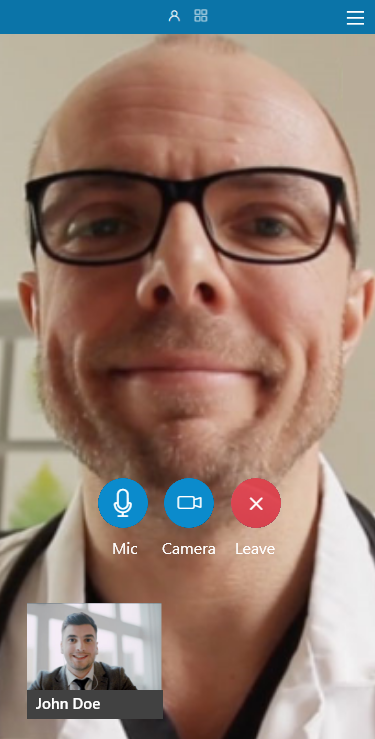
7. Use the mic and camera buttons to turn your video and audio on/off.
Once you’re in the meeting, you can use the mic and camera buttons as shown below, to turn your video and audio on/off. Click the red button to leave the meeting when it’s over.
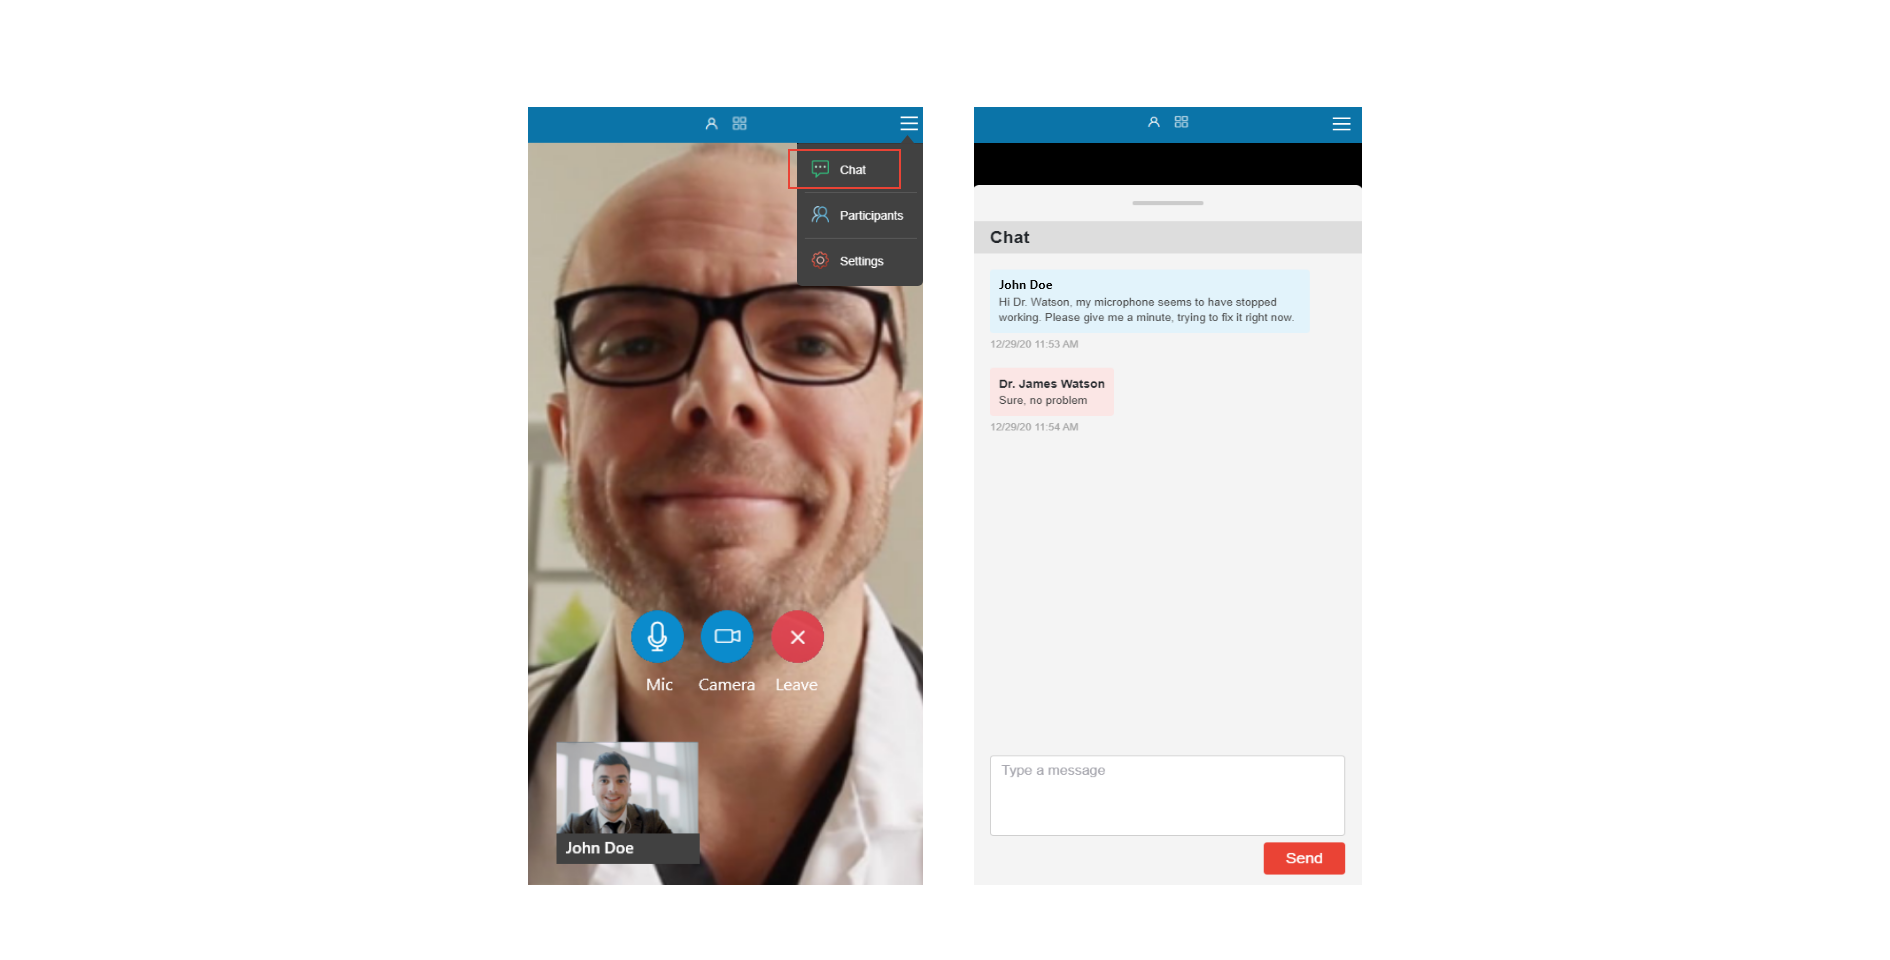
8. You can also chat with the provider during your visit.
For anything that cannot be communicated to the provider via audio, you can use the video chat.
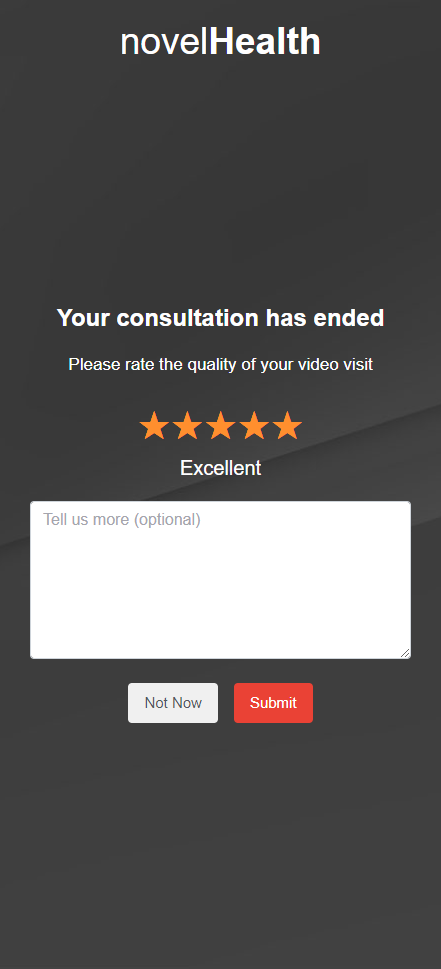
9. Provide your feedback on the visit quality
Once the visit is over, please feel free to submit your feedback. You can rate the quality of your visit and tell us anything that you liked or disliked about the visit.
