Digital Check In – Clinical History
This guide to the Clinical History Module of the Digital Check-in (DCI) procedure helps users in enabling and managing patient medical information. This includes their Medical History, Surgical History, Family History, Social History, Allergies and Medications. Each section highlights the steps to configure that section to be a part of the DCI workflow.
Medical History
To enter the Medical History, the patient selects all past and current medical conditions.
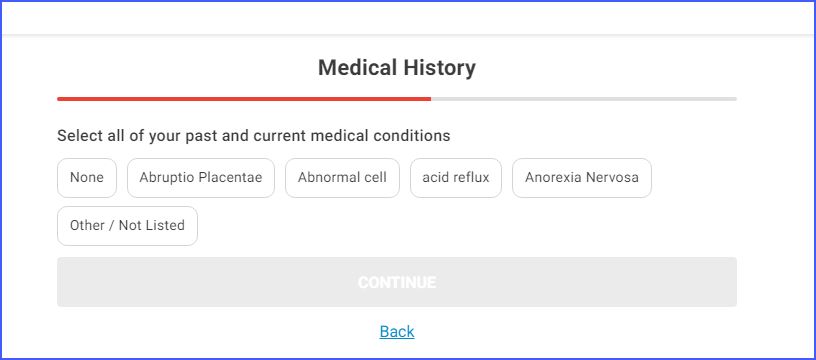
1. Access Medical History
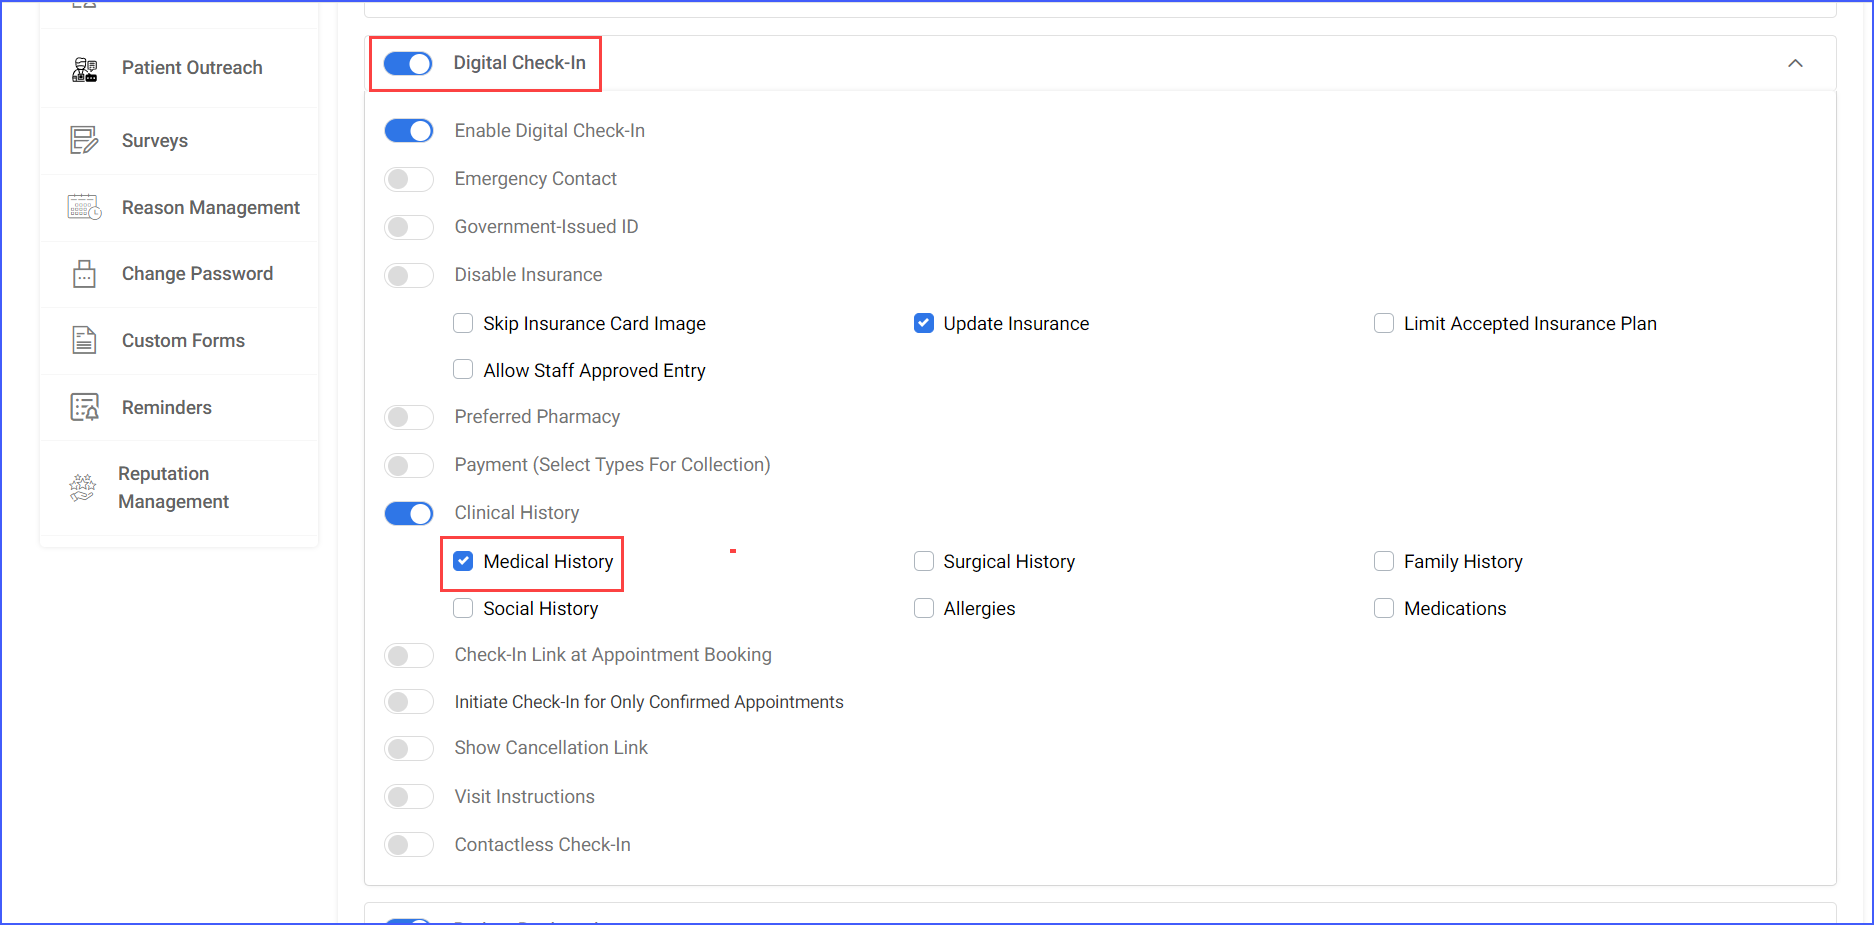
- The Medical History section appears after selecting the Preferred Pharmacy details if the “Clinical History” option is enabled and the “Medical History” checkbox is checked.
- To enable Medical History, navigate to:
- Settings > Users > Provider > Account > Digital Check-In > Clinical History > Medical History
2. Select Conditions
- The patient can select from a list of medical conditions or click “Other / Not Listed” to add a condition not displayed.
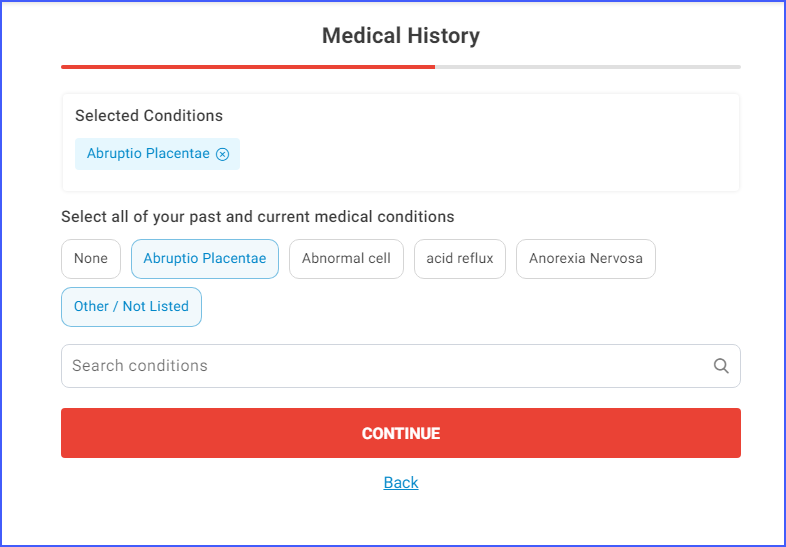
- Each selected condition appears under “Selected Conditions.”
- The patient can remove a condition by clicking the ‘x’ next to the condition name.
- A search bar is available to quickly find specific conditions.
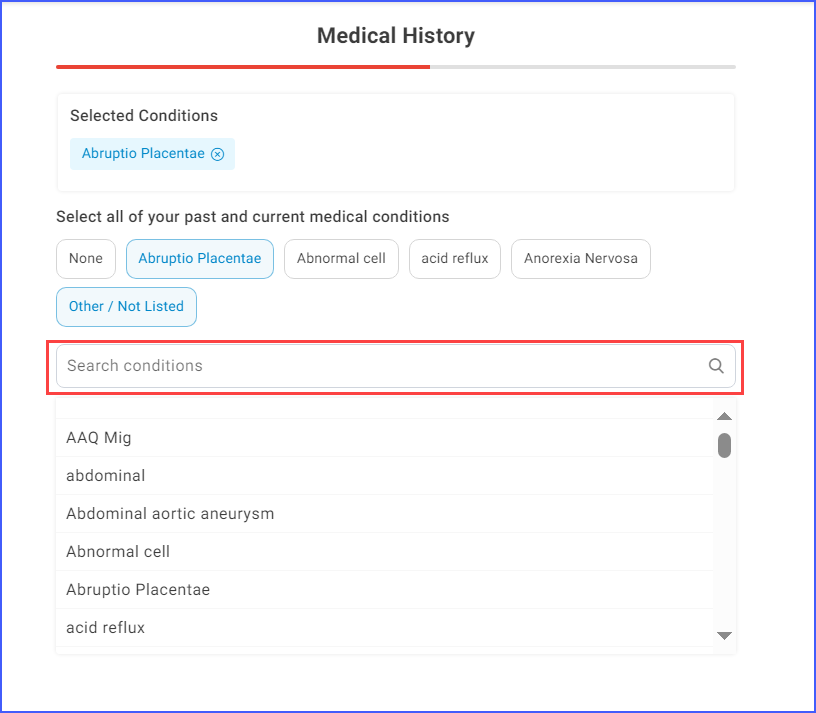
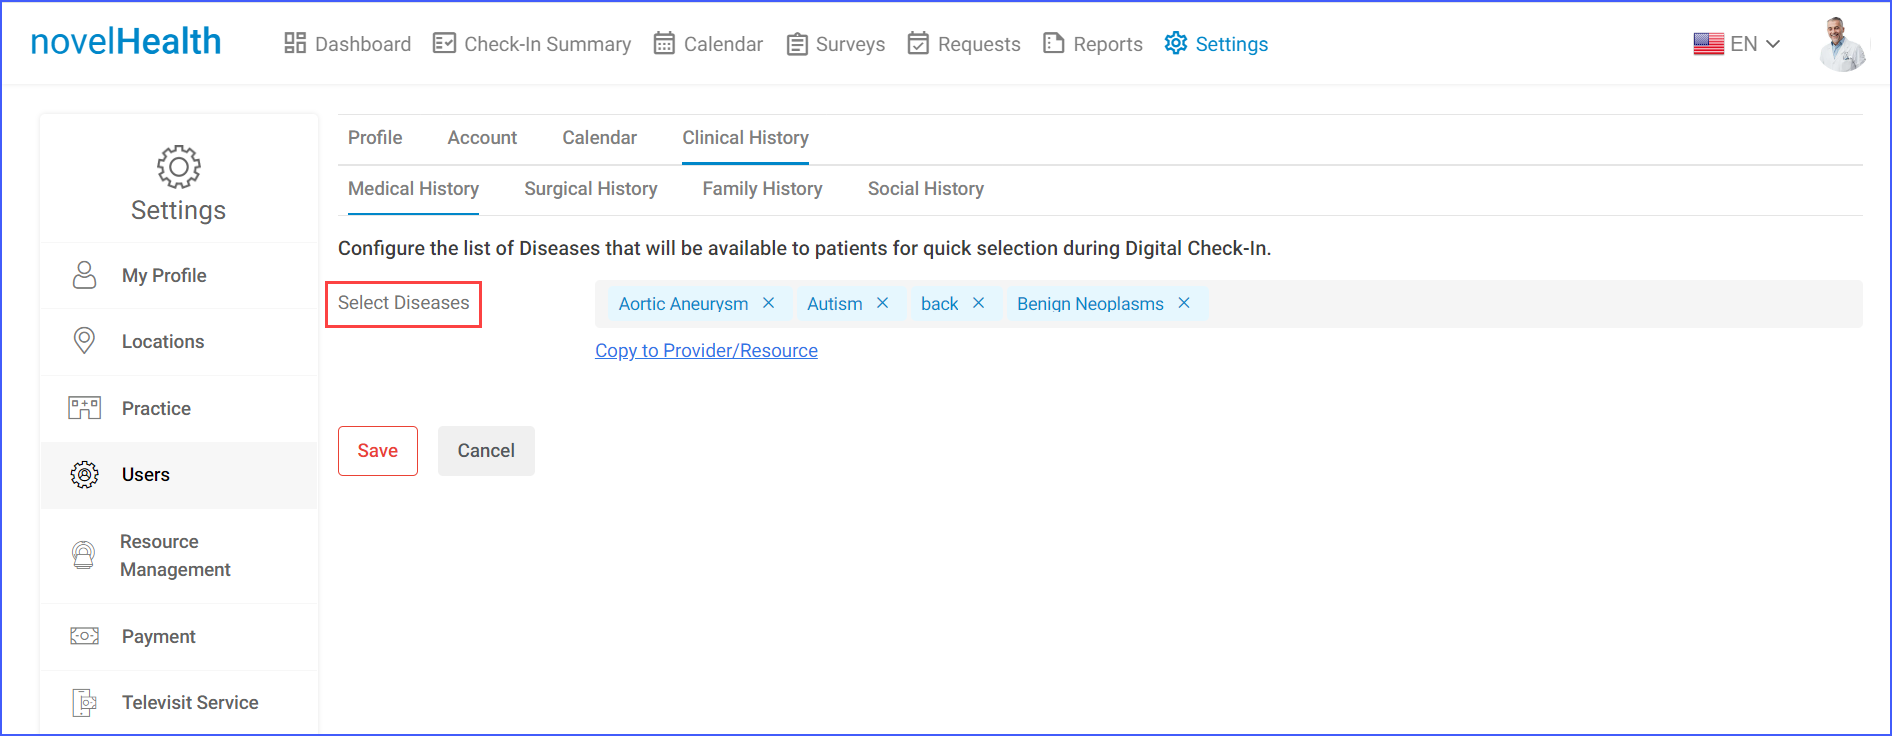
Note: Diseases that will populate on the front end for patients to choose from when entering their medical history can be selected by navigating to:
- Settings > Users > Provider > Account > Clinical History > Medical History
3. Save and Continue
- Once all conditions are selected, the patient clicks “Continue” to proceed.
Surgical History
To enter the Surgical History, the patient selects the surgeries or procedures they have had.
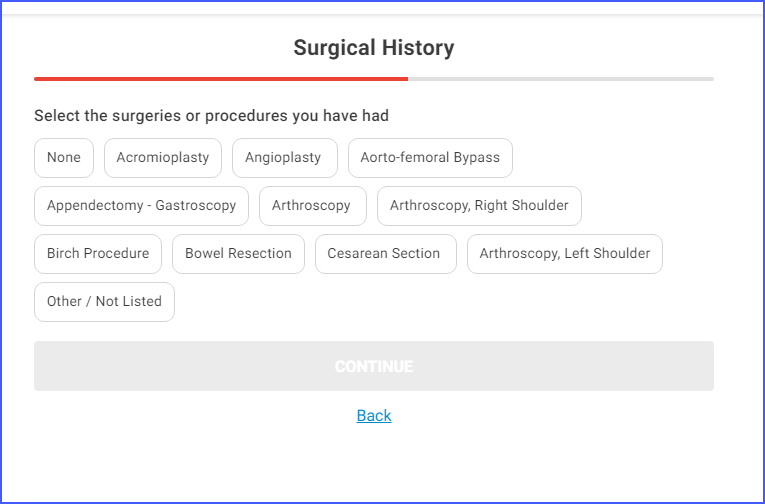
1. Access Surgical History
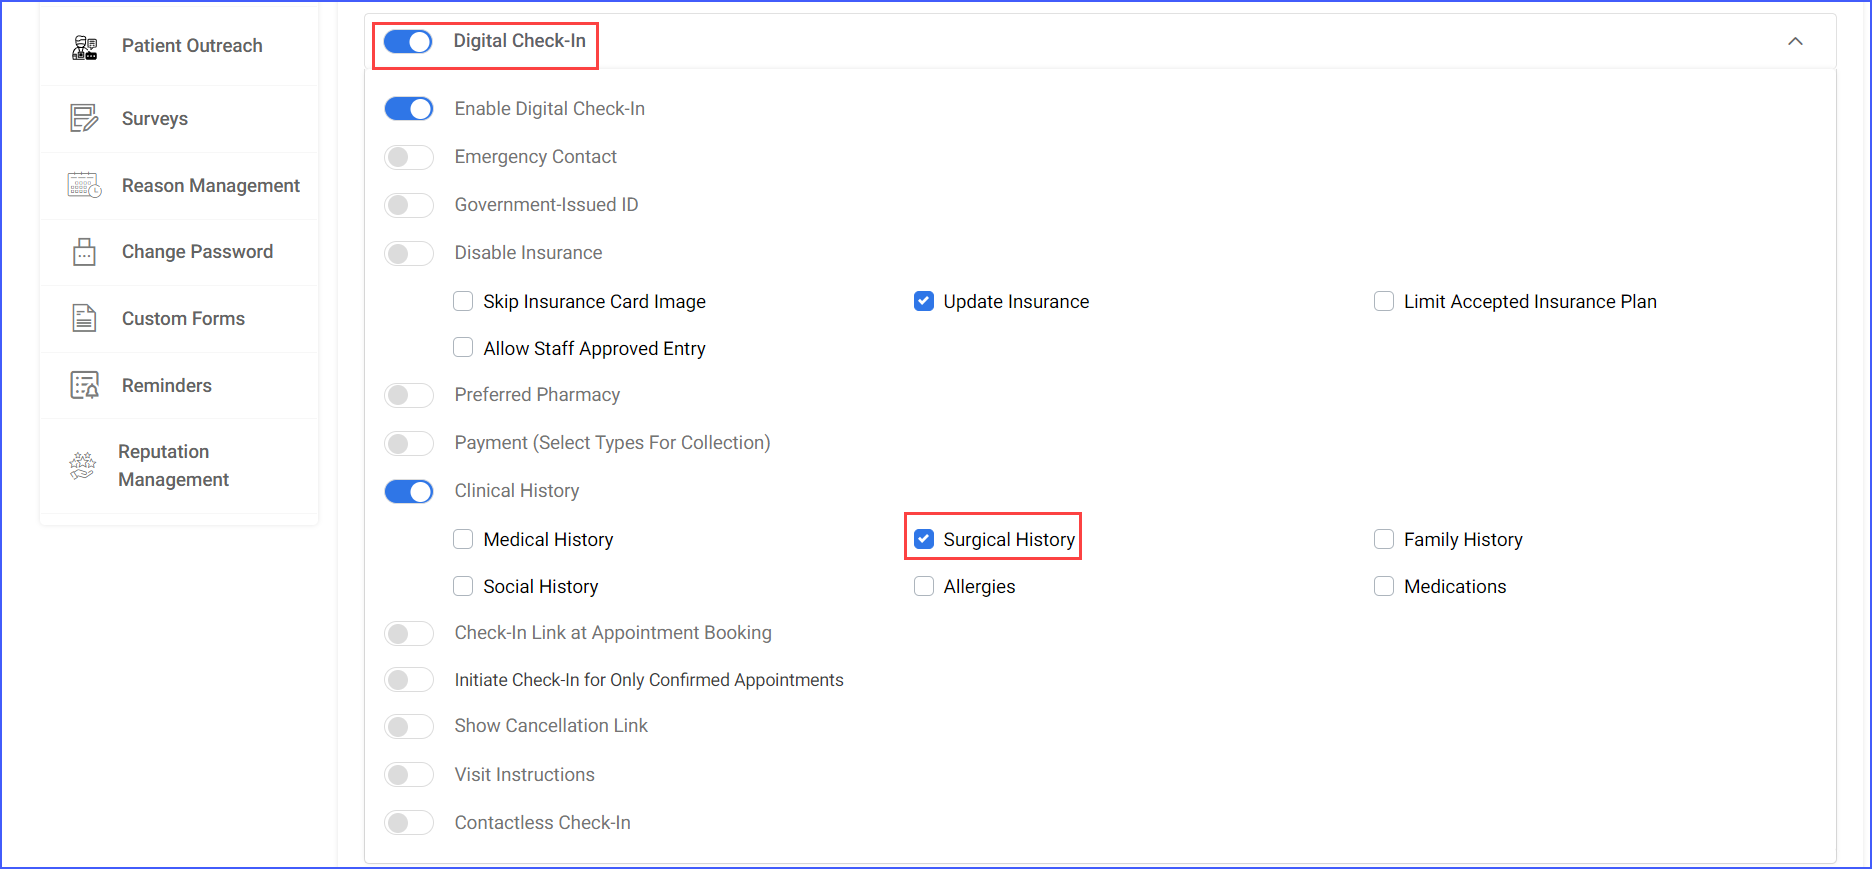
- The Surgical History section appears after entering Medical History details if the “Clinical History” option is enabled and the “Surgical History” checkbox is checked.
- To enable Surgical History, navigate to:
- Settings > Users > Provider > Account > Digital Check-In > Clinical History > Surgical History
2. Select Surgeries
- The patient can select from a list of surgeries or procedures or click “Other / Not Listed” to add a surgery not displayed.
- Each selected surgery appears under “Selected Surgeries.”
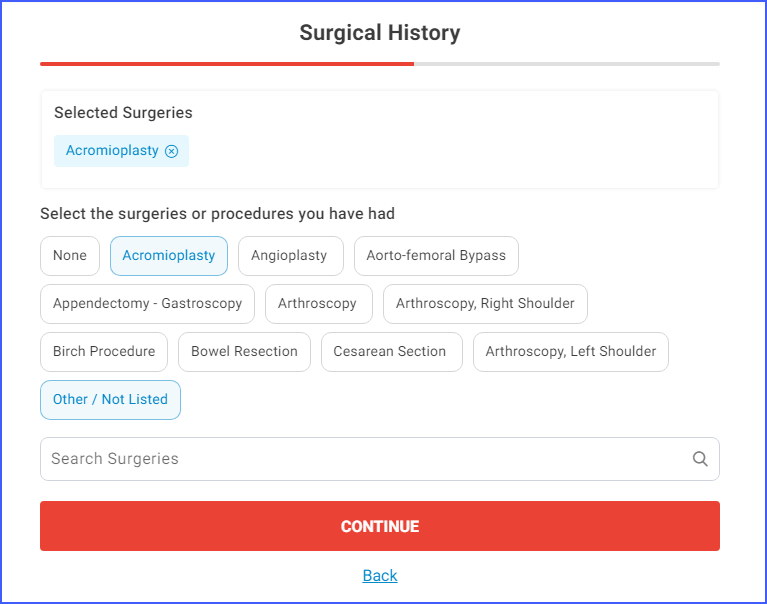
- The user can remove a surgery by clicking the ‘x’ next to the surgery name.
- A search bar is available to quickly find specific surgeries.
Note: Surgeries that will populate on the front end for patients to choose from when entering their surgical history can be selected by navigating to:
- Settings > Users > Provider > Account > Clinical History > Surgical History

3. Save and Continue
- Once all surgeries are selected, the user clicks “Continue” to proceed.
Family History
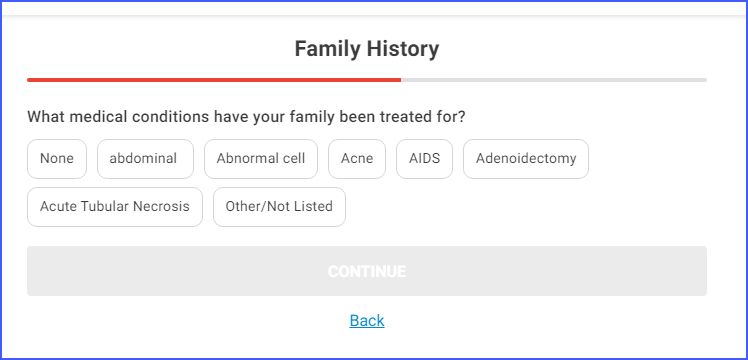
To enter the Family History, the patient selects the medical conditions their family members have been treated for.
1. Access Family History
- The Family History section appears after entering Surgical History details if the “Clinical History” option is enabled and the “Family History” checkbox is checked.
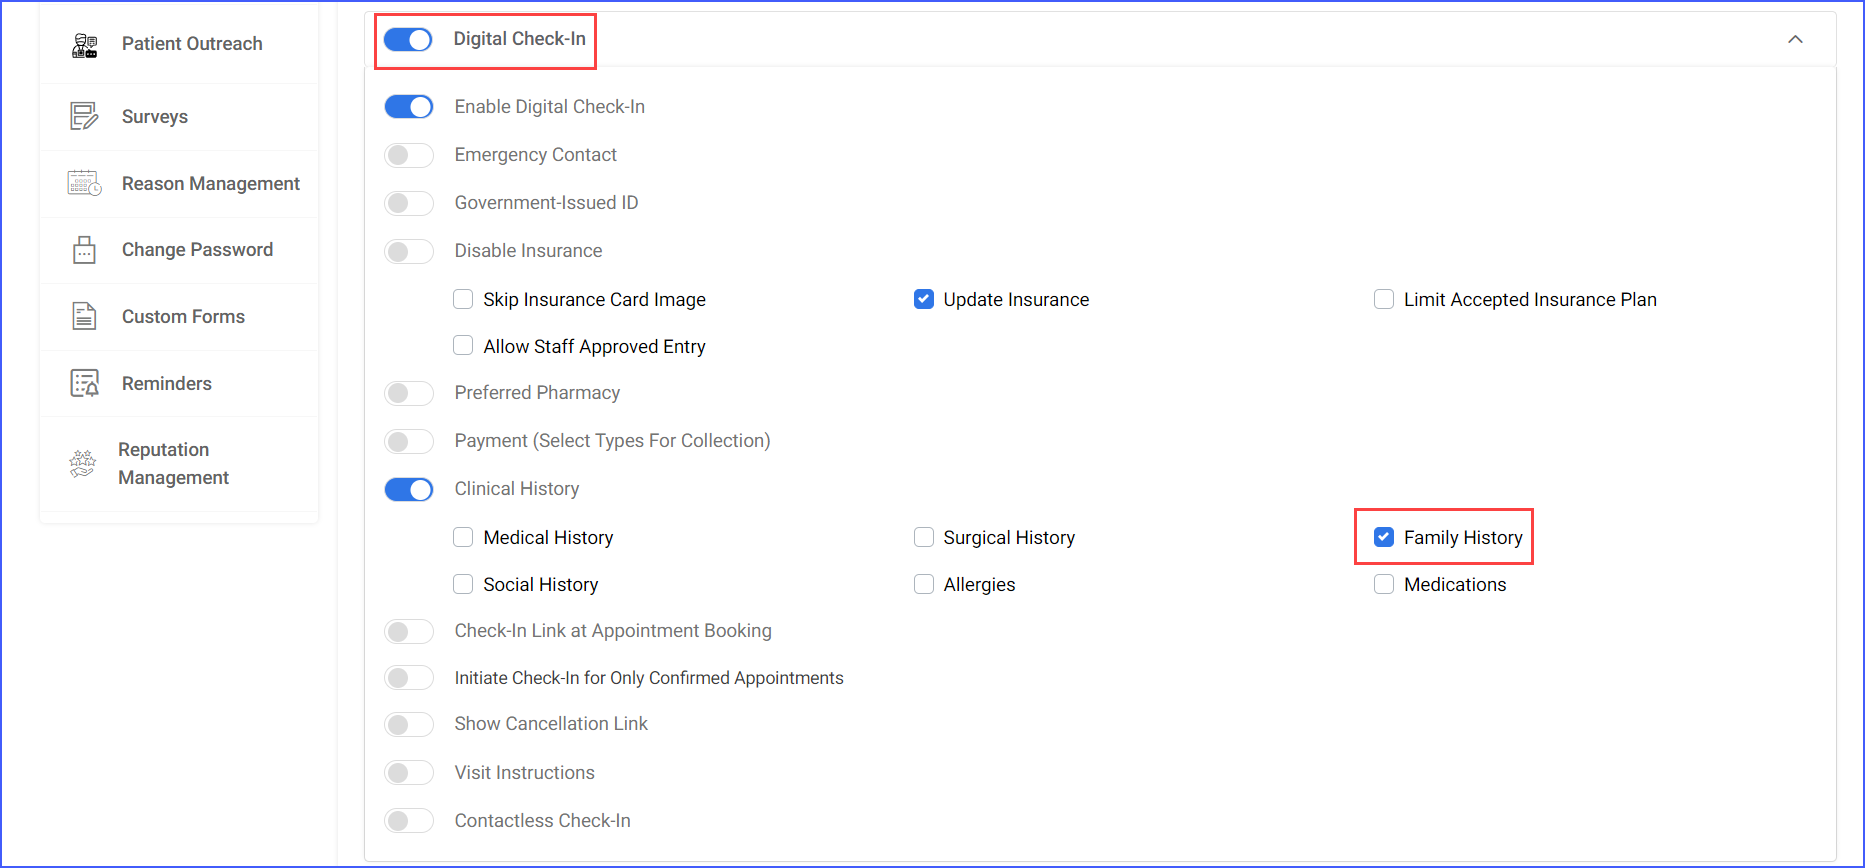
- To enable Family History, navigate to:
- Settings > Users > Provider > Account > Digital Check-In > Clinical History > Family History
2. Select Family Conditions
- The patient can select from a list of family medical conditions or click “Other / Not Listed” to add a condition not displayed.
- The patient can specify the family member affected by selecting a condition and then choosing the family member from the list.
- Each selected condition and associated family member appear under “Selected Diseases.”
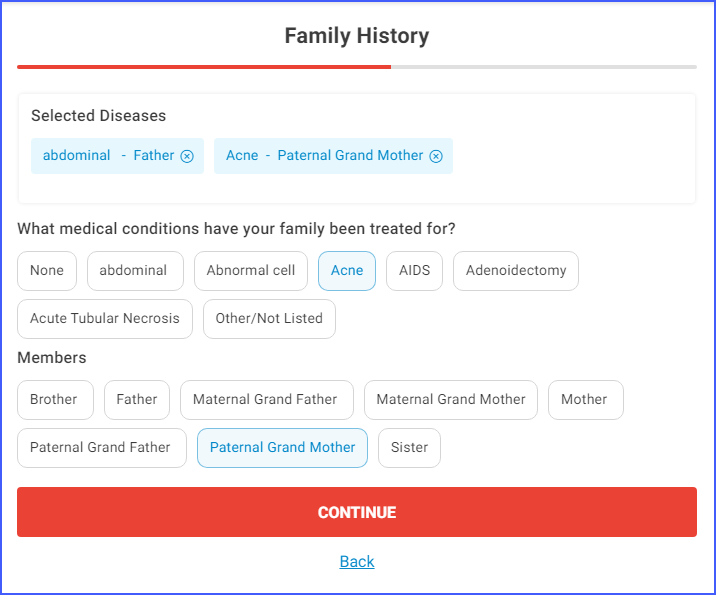
- The patient can remove a condition by clicking the ‘x’ next to the condition name.
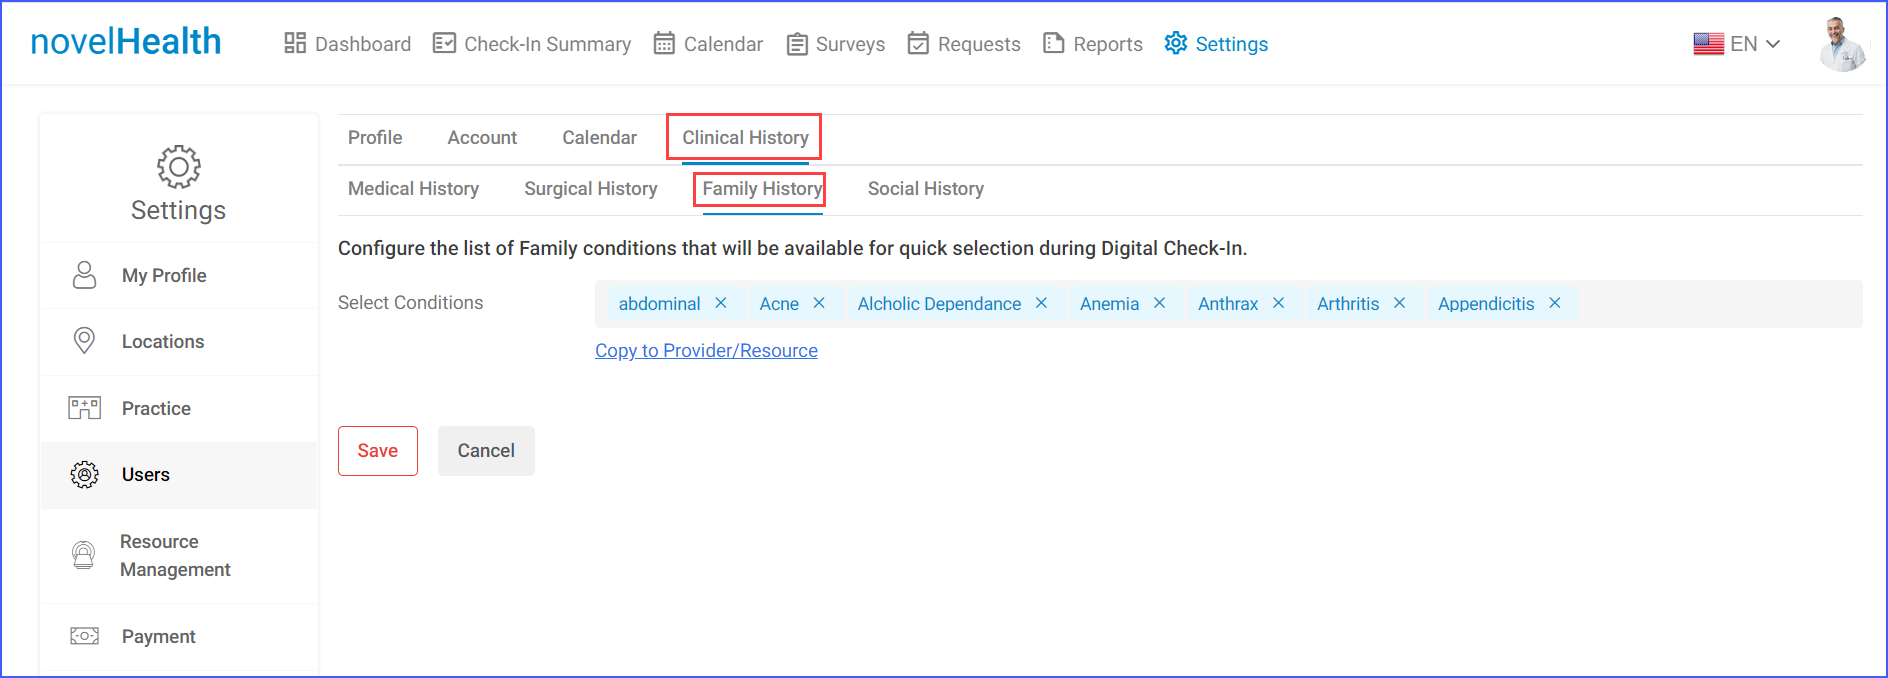
Note: Conditions that will populate on the front end for patients to choose from when entering their family history can be selected by navigating to:
- Settings > Users > Provider > Account > Clinical History > Family History
3. Save and Continue
- Once all conditions are selected, the user clicks “Continue” to proceed.
Social History
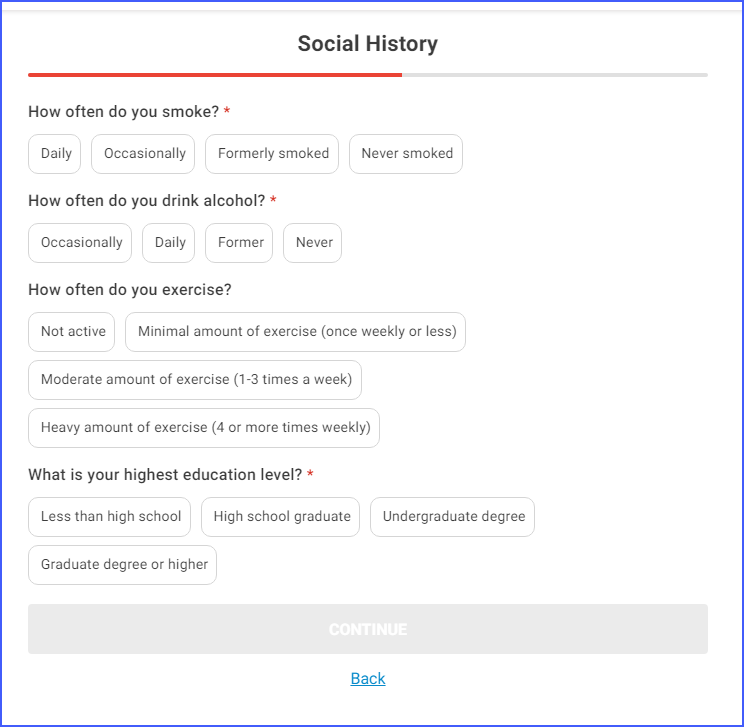
To enter Social History, the patient selects various lifestyle and demographic details.
1. Access Social History
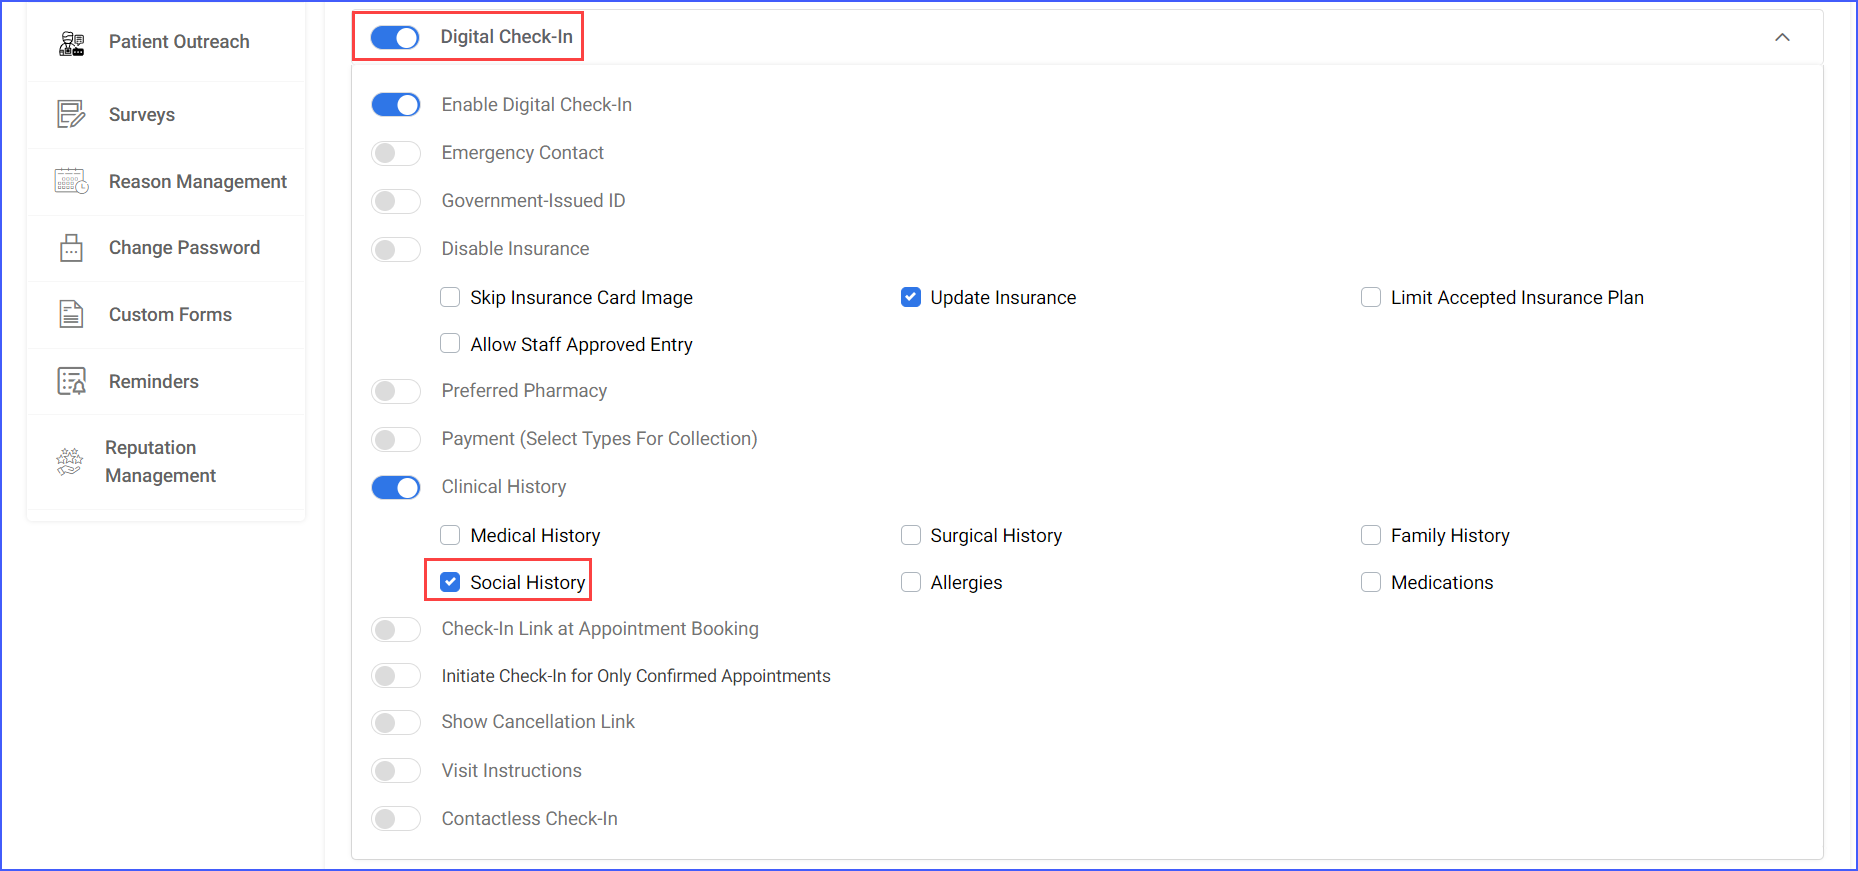
- The Social History section appears after entering Surgical History details if the “Clinical History” option is enabled and the “Social History” checkbox is checked.
- To enable Social History, navigate to:
- Settings > Users > Provider > Account > Digital Check-In > Clinical History > Social History
2. Select Social History Details
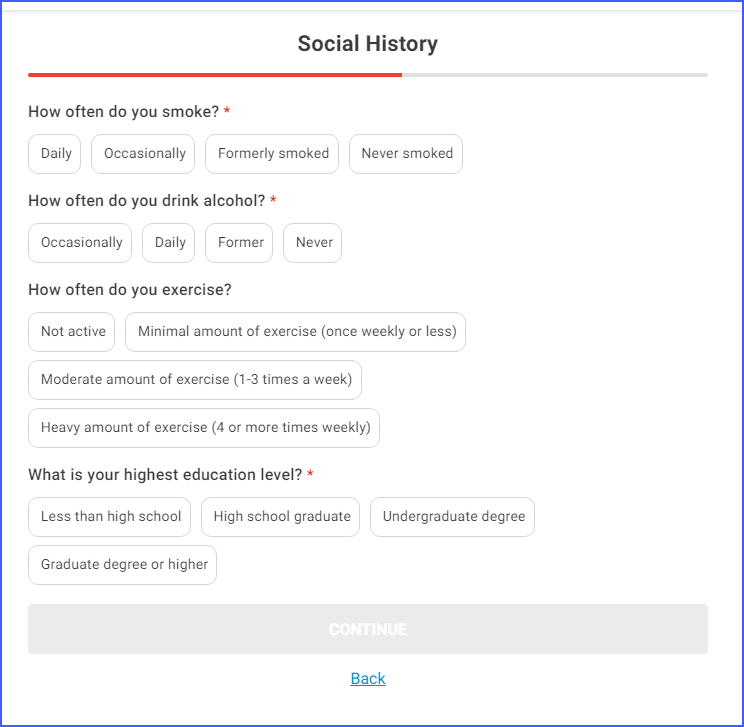
- The patient answers questions about smoking, alcohol consumption, exercise, and education level by selecting the appropriate options.
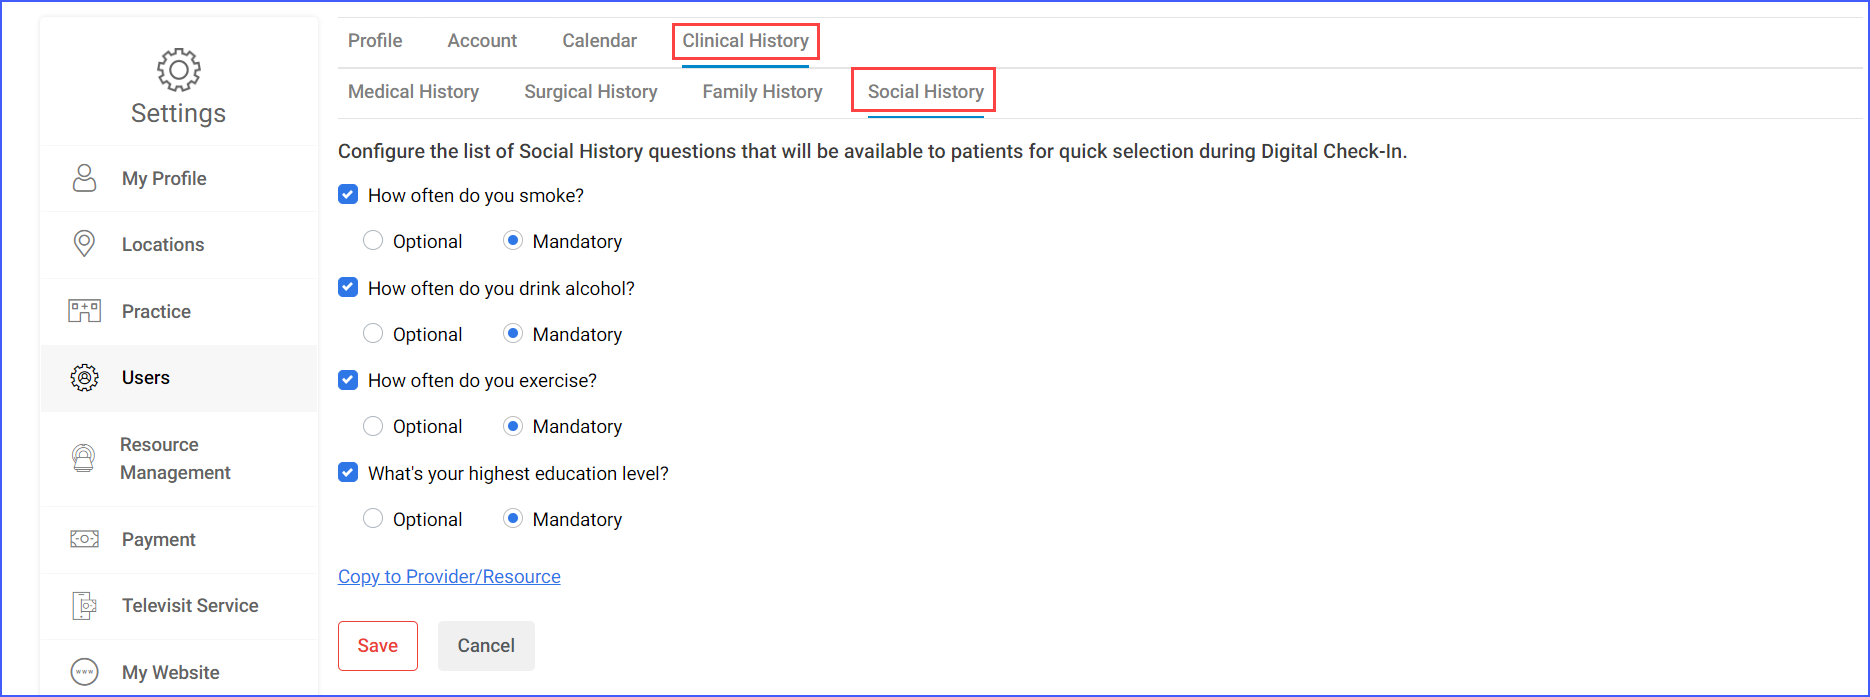
Note: Questions that will populate on the front end for patients to answer when entering their social history can be selected by navigating to:
- Settings > Users > Provider > Account > Clinical History > Social History
3. Save and Continue
- Once all details are selected, the user clicks “Continue” to proceed.
Allergies
To enter Allergy details, the patient selects any allergies they may have and related symptoms.
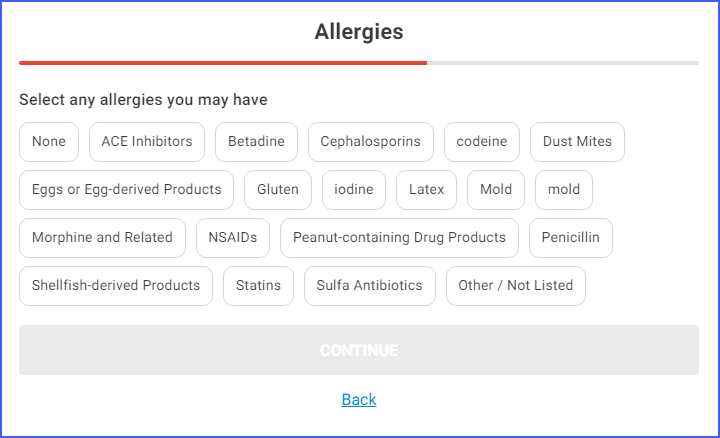
1. Access Allergies
- The Allergies section appears after entering Social History details if the “Clinical History” option is enabled and the “Allergies” checkbox is checked.
- To enable Allergies, navigate to:
- Settings > Users > Provider > Account > Digital Check-In > Clinical History > Allergies
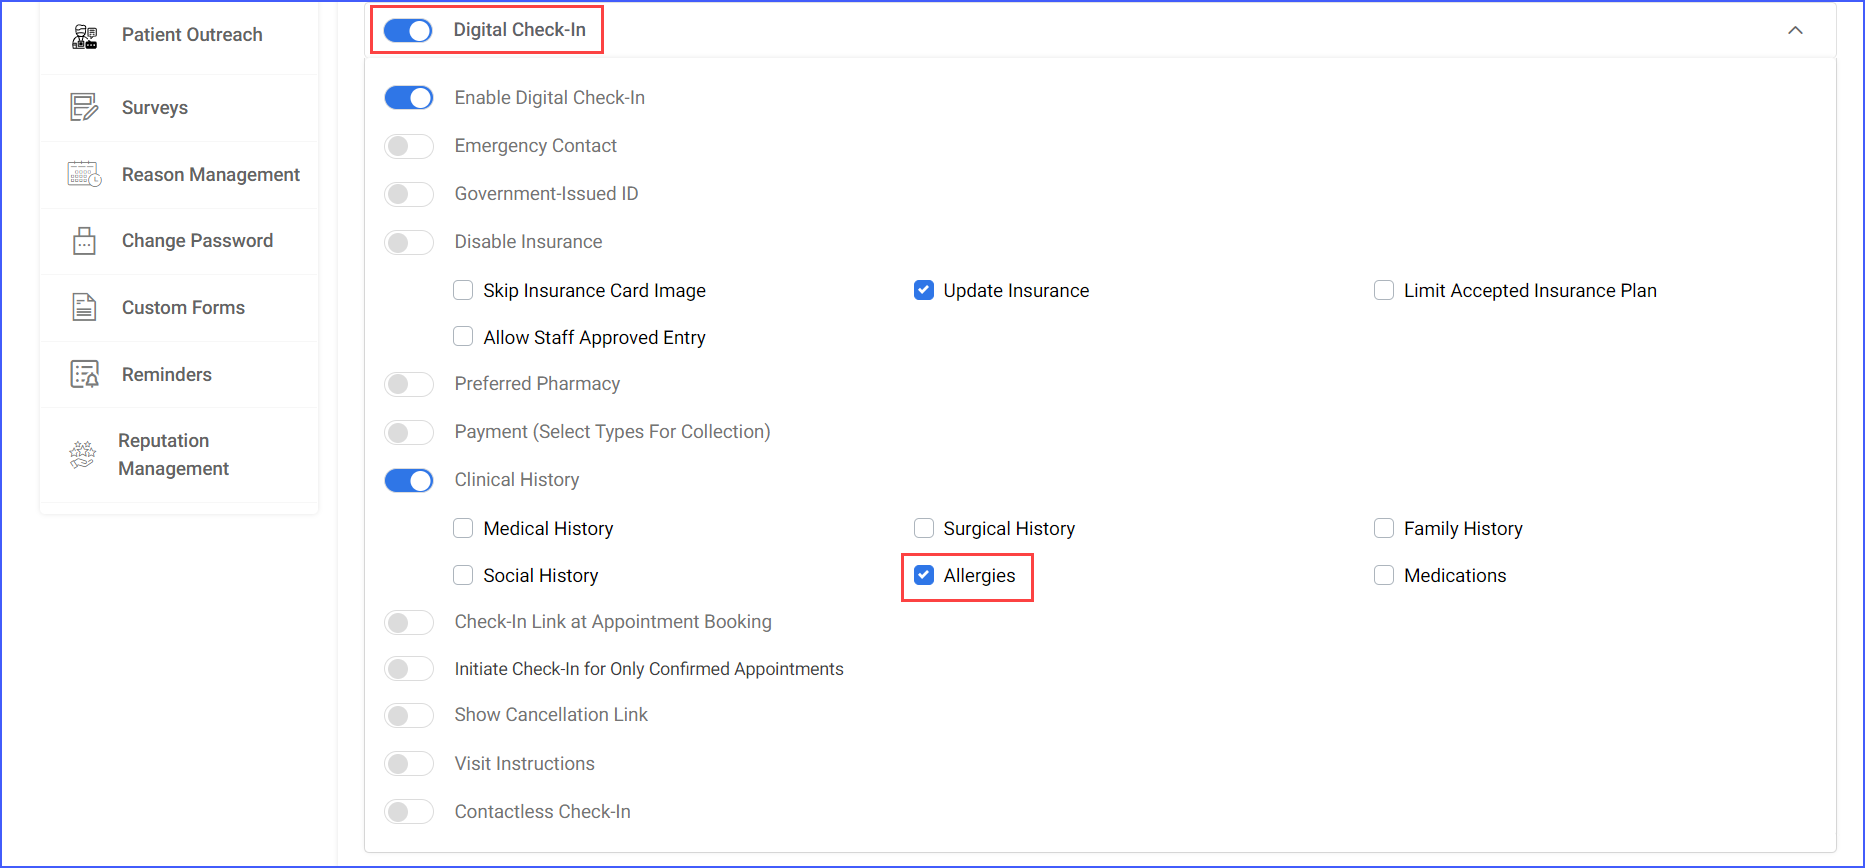
2. Select Allergies
- The patient can select from a list of common allergens or click “Other / Not Listed” to add an allergy not displayed.
- The patient can then select symptoms associated with each allergy from a list provided.
- Each selected allergy appears under “Selected Allergies.”
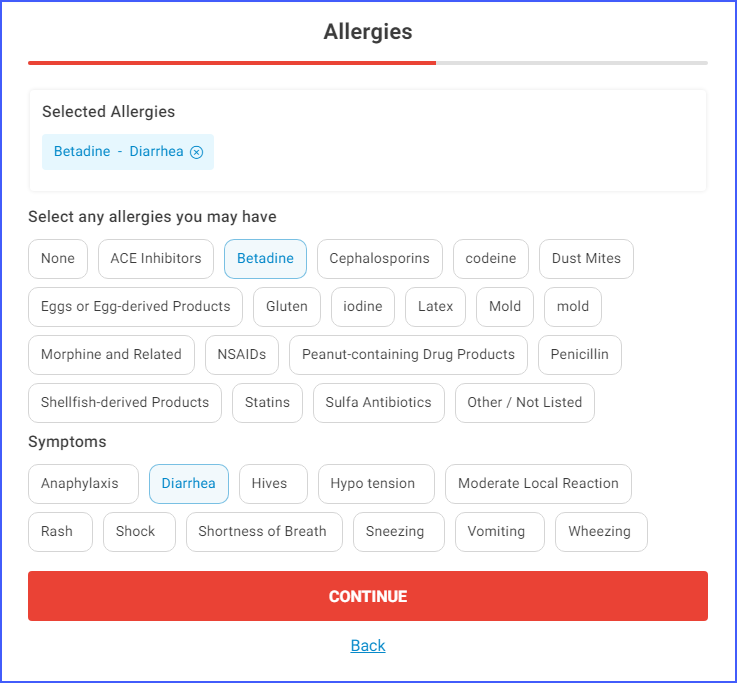
- The user can remove an allergy by clicking the ‘x’ next to the allergy name.
3. Save and Continue
- Once all allergies and symptoms are selected, the user clicks “Continue” to proceed.
Medications
To enter Medication details, the patient selects any medications they are currently taking.
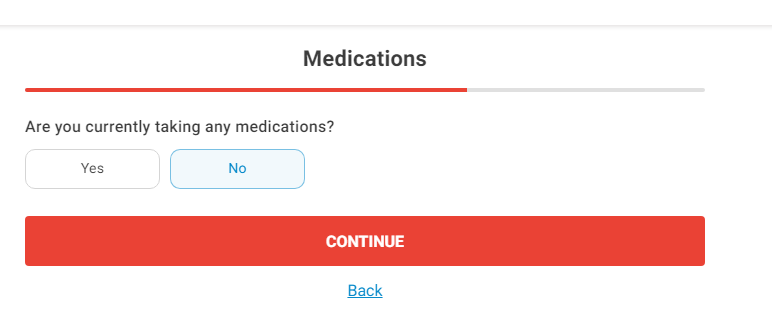
1. Access Medications
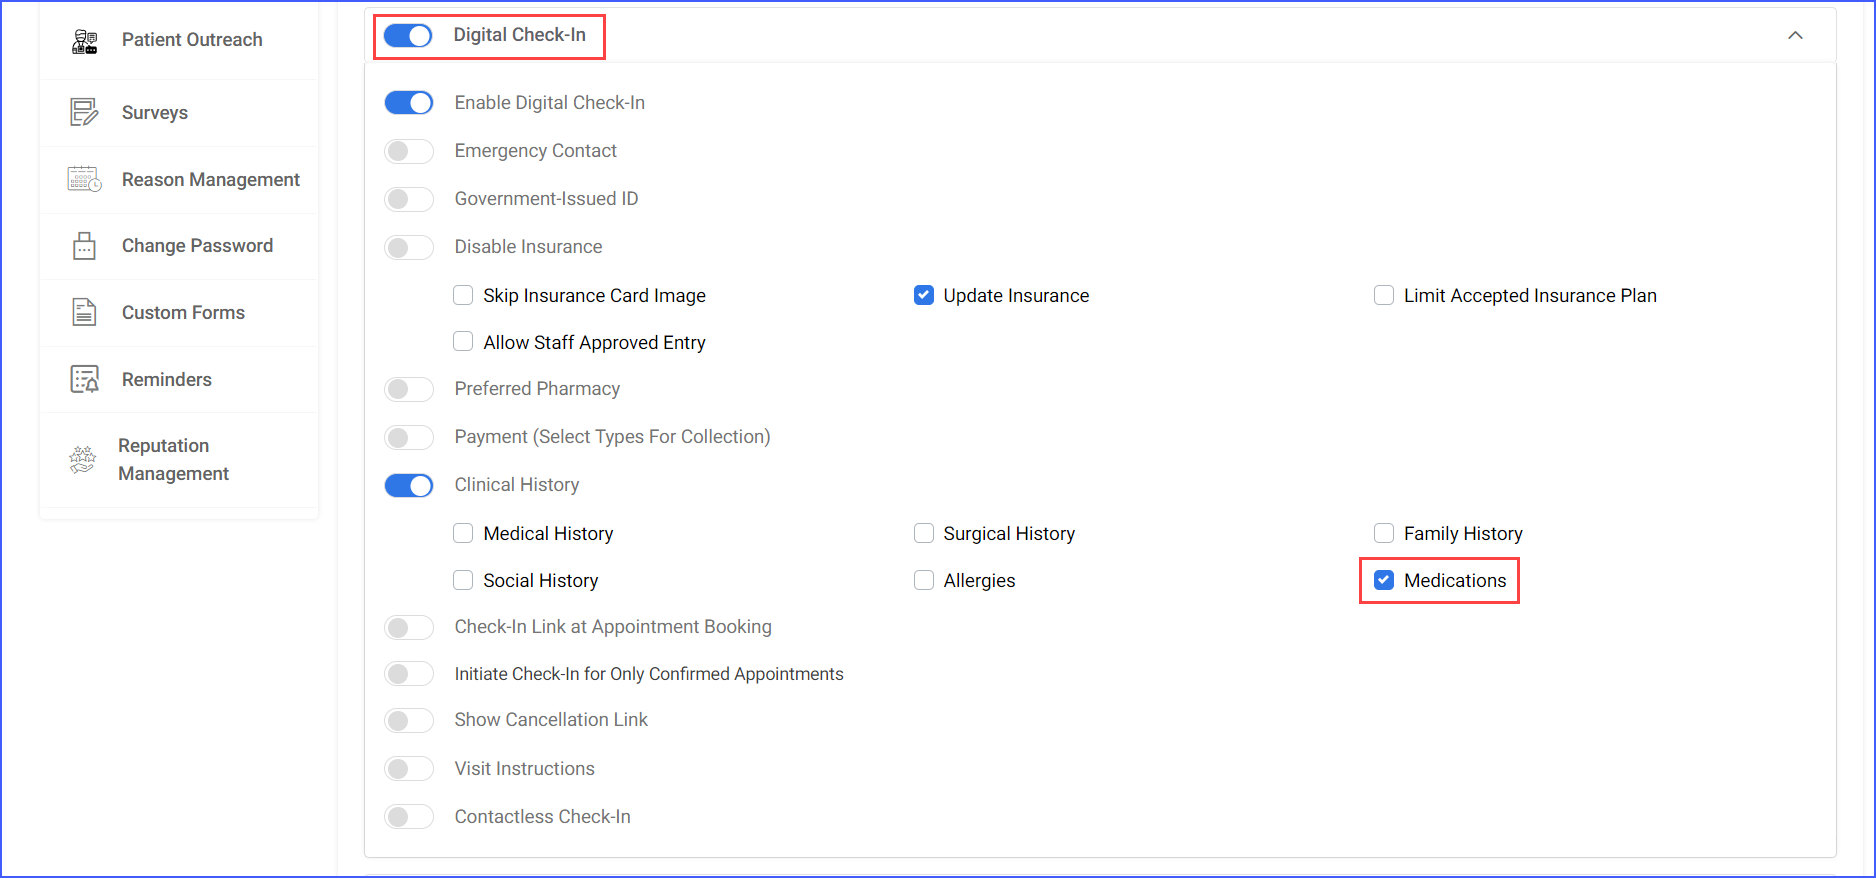
- The Medications section appears after entering Allergy details if the “Clinical History” option is enabled and the “Medications” checkbox is checked.
- To enable Medications, navigate to:
- Settings > Users > Provider > Account > Digital Check-In > Clinical History > Medications
2. Select Medications
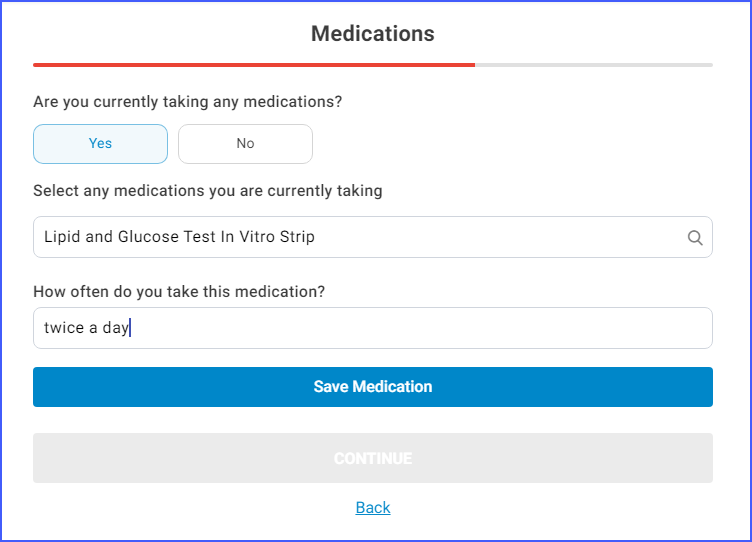
- The patient can search for and select medications from a list.
- Each selected medication appears under “Selected Medications.”
- The patient can specify the frequency of medication intake.
- Add More Medications:
- The user can add more medications by clicking “Add Another Medication.”
3. Save and Continue
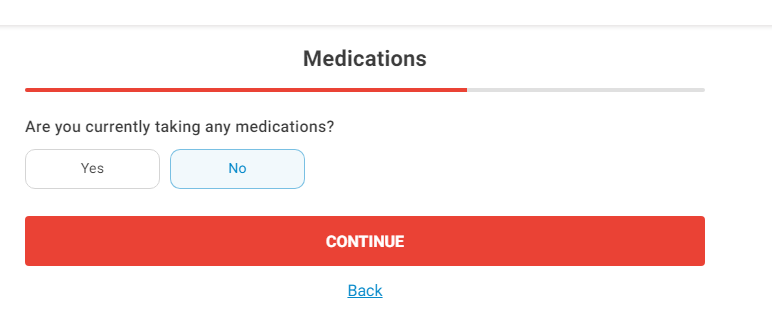
- Once all medications are entered, the user clicks “Continue” to proceed.
