Digital Check-In

Written by novelHealth Help Center
Updated about a 3 years ago
Digital Check-in
The Digital Check-in (DCI) for novelHealth is a multi-purpose feature that makes healthcare services a more seamless experience for the users.
Digital check-in is a process whereby a person electronically provides appointment confirmation and all the necessary information or forms required for a visit prior to the scheduled appointment. This can include a patient’s demographics, their clinical history, insurance details, payment, consent and custom forms. This function proves beneficial by allowing the provider to prepare for the consultation in advance using the gathered information, ultimately saving time and resources during the appointment.
Digital Check-in is an integrated feature between the CureMD 10g application and novelHealth.
Digital Check-in through 10g application
Digital Check-in can be enabled through the 10g application by navigating to Settings > Practice > Practice Settings. Here, click the novelHealth node and then select the ‘Settings’ tab.
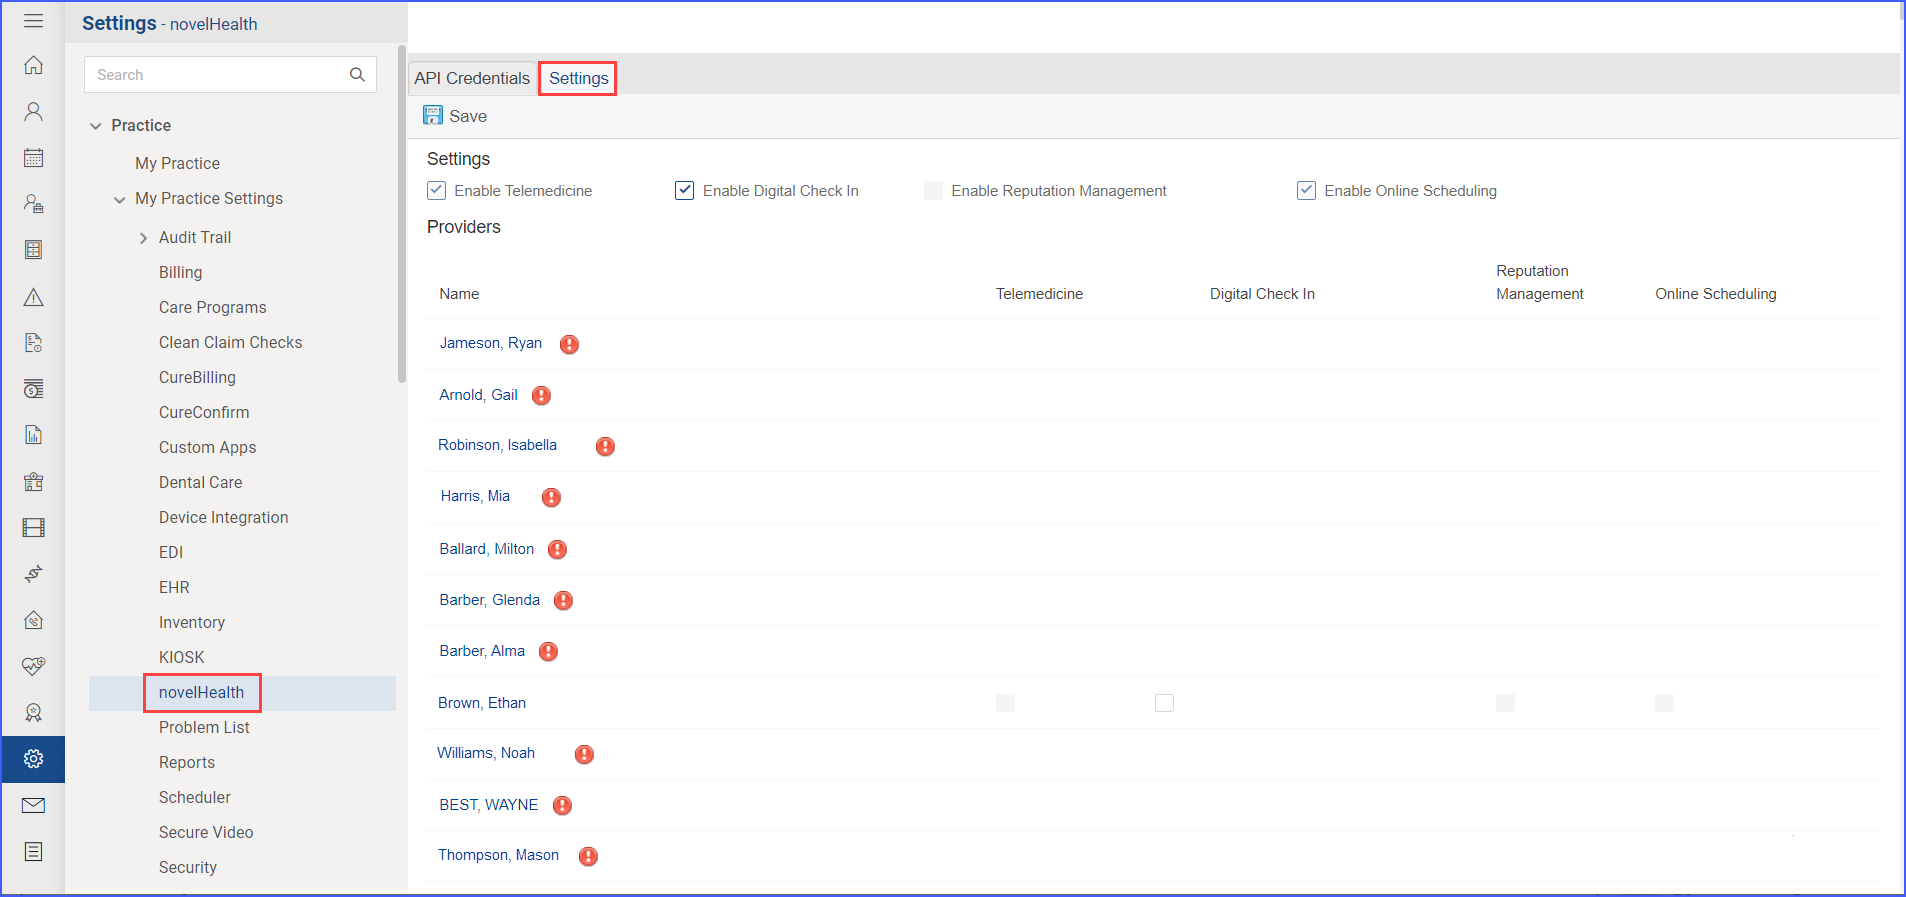
At the top of the page there are 4 checkboxes available to configure settings at the practice level for novelHealth.
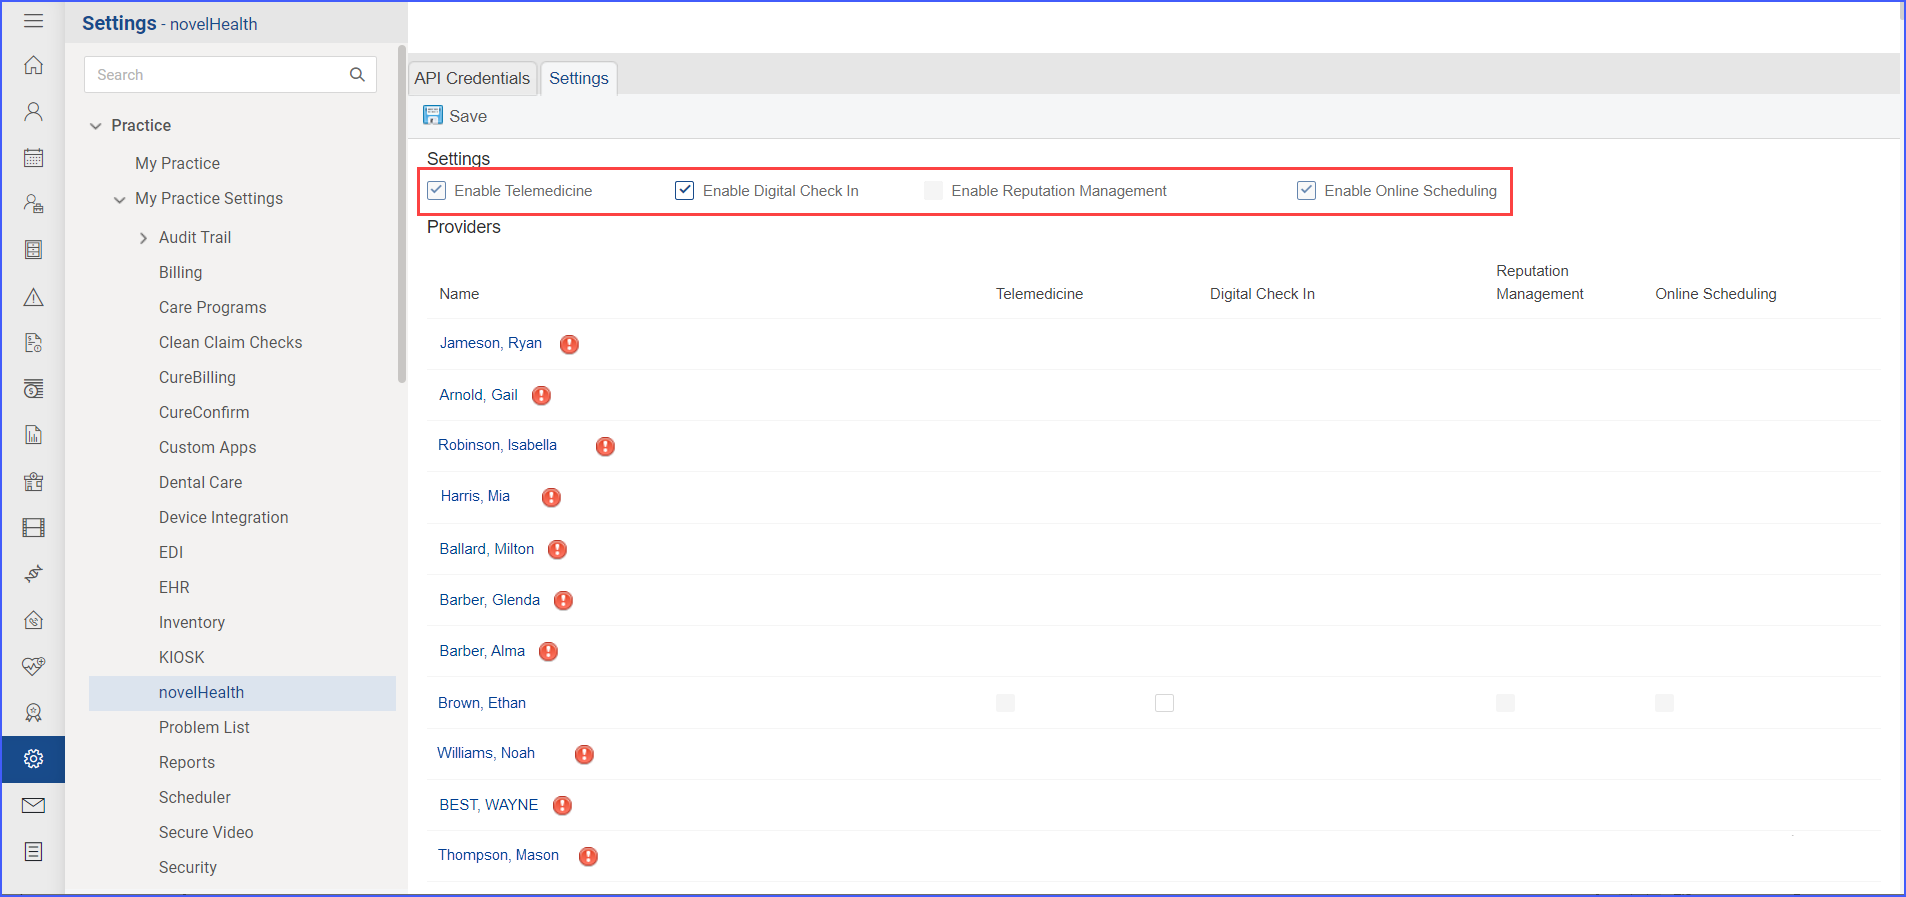
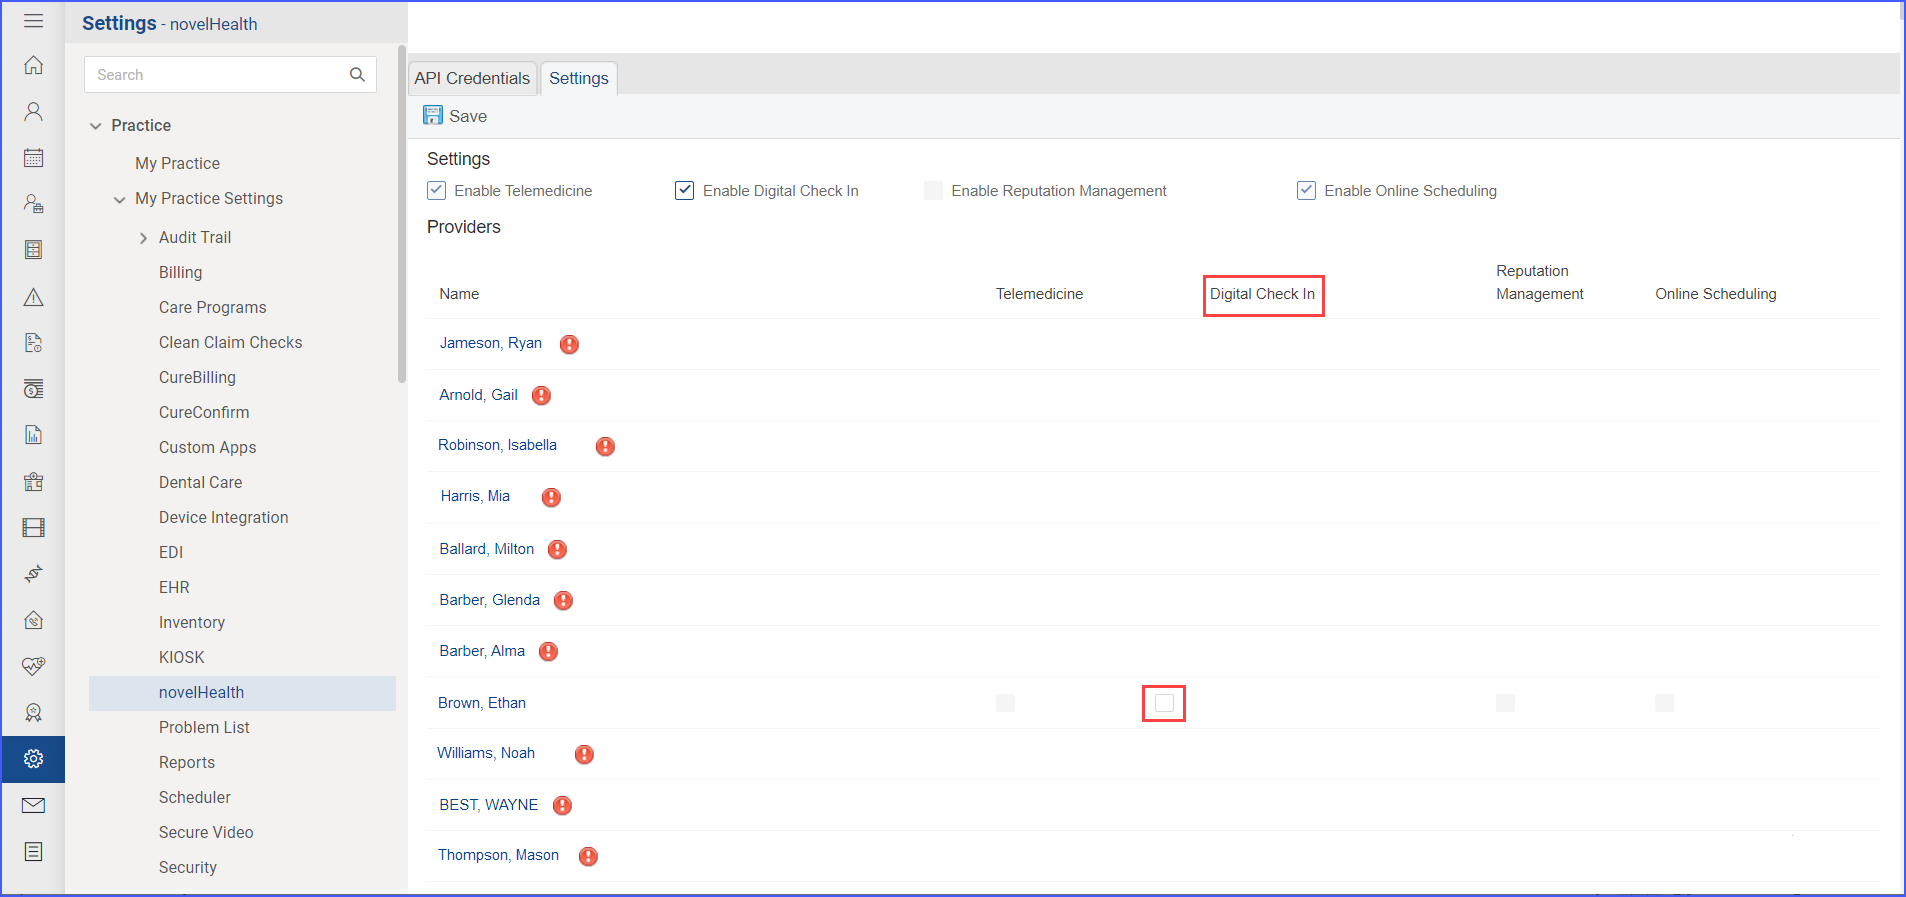
The Digital Check In feature can be enabled by clicking the checkbox for ‘Enable Digital Check In’. To further enable digital check in for each individual provider, scroll down to the relevant provider and select the checkbox under the column titled Digital Check In.
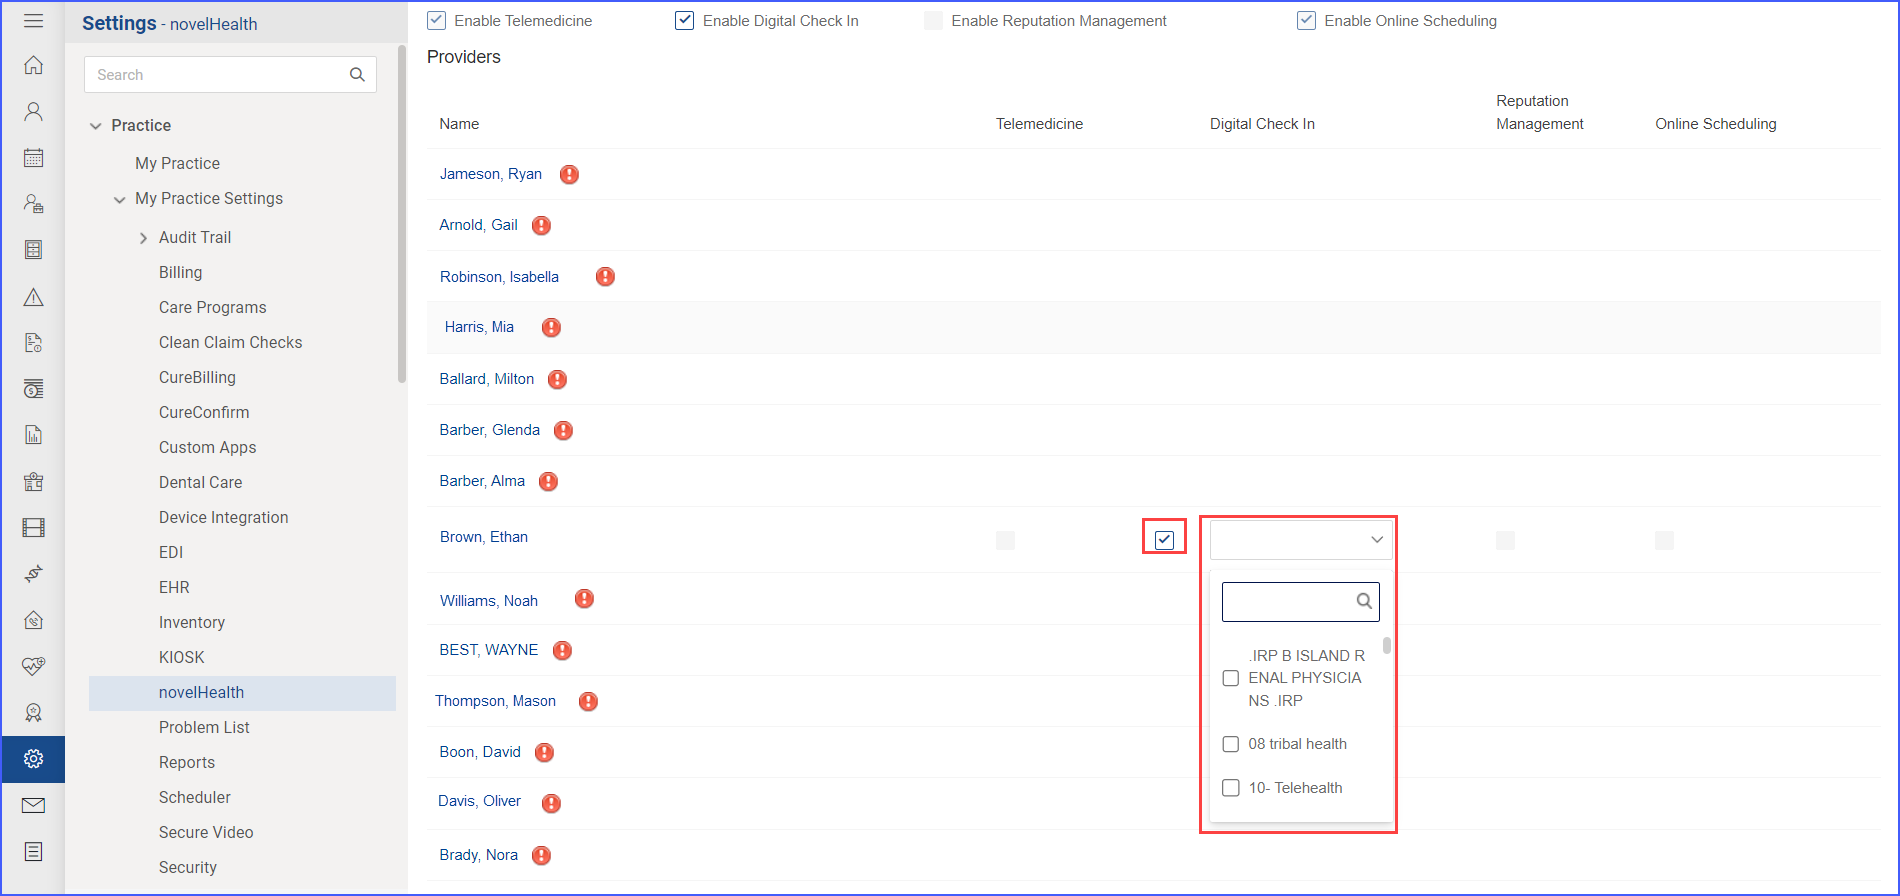
There is also an option to choose specific locations of each provider for which DCI is to be permitted, by selecting the desired locations from the drop-down list that is displayed once the checkbox is enabled.
Digital Check in for Appointment Reasons
Digital Check In can also be enabled for particular appointment reasons by accessing the Settings > Practice > Appointment Reason workflow. Within the ‘Appointment Reason’ tab is a list of all saved appointment reasons associated with the practice.
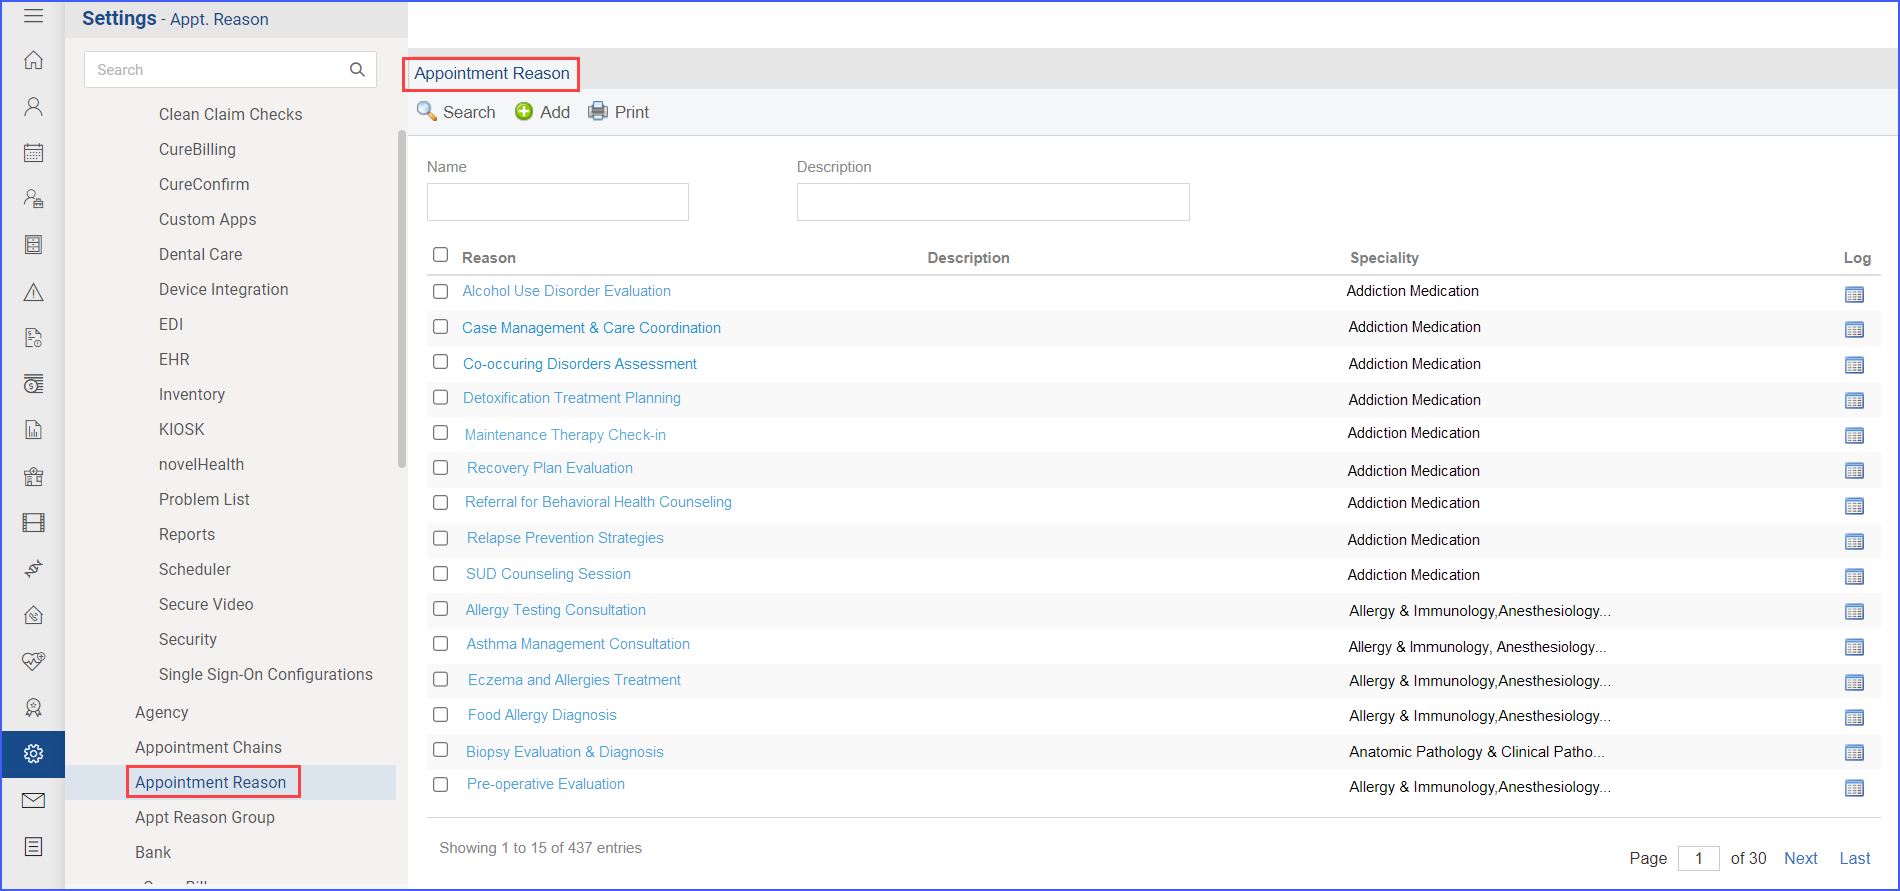
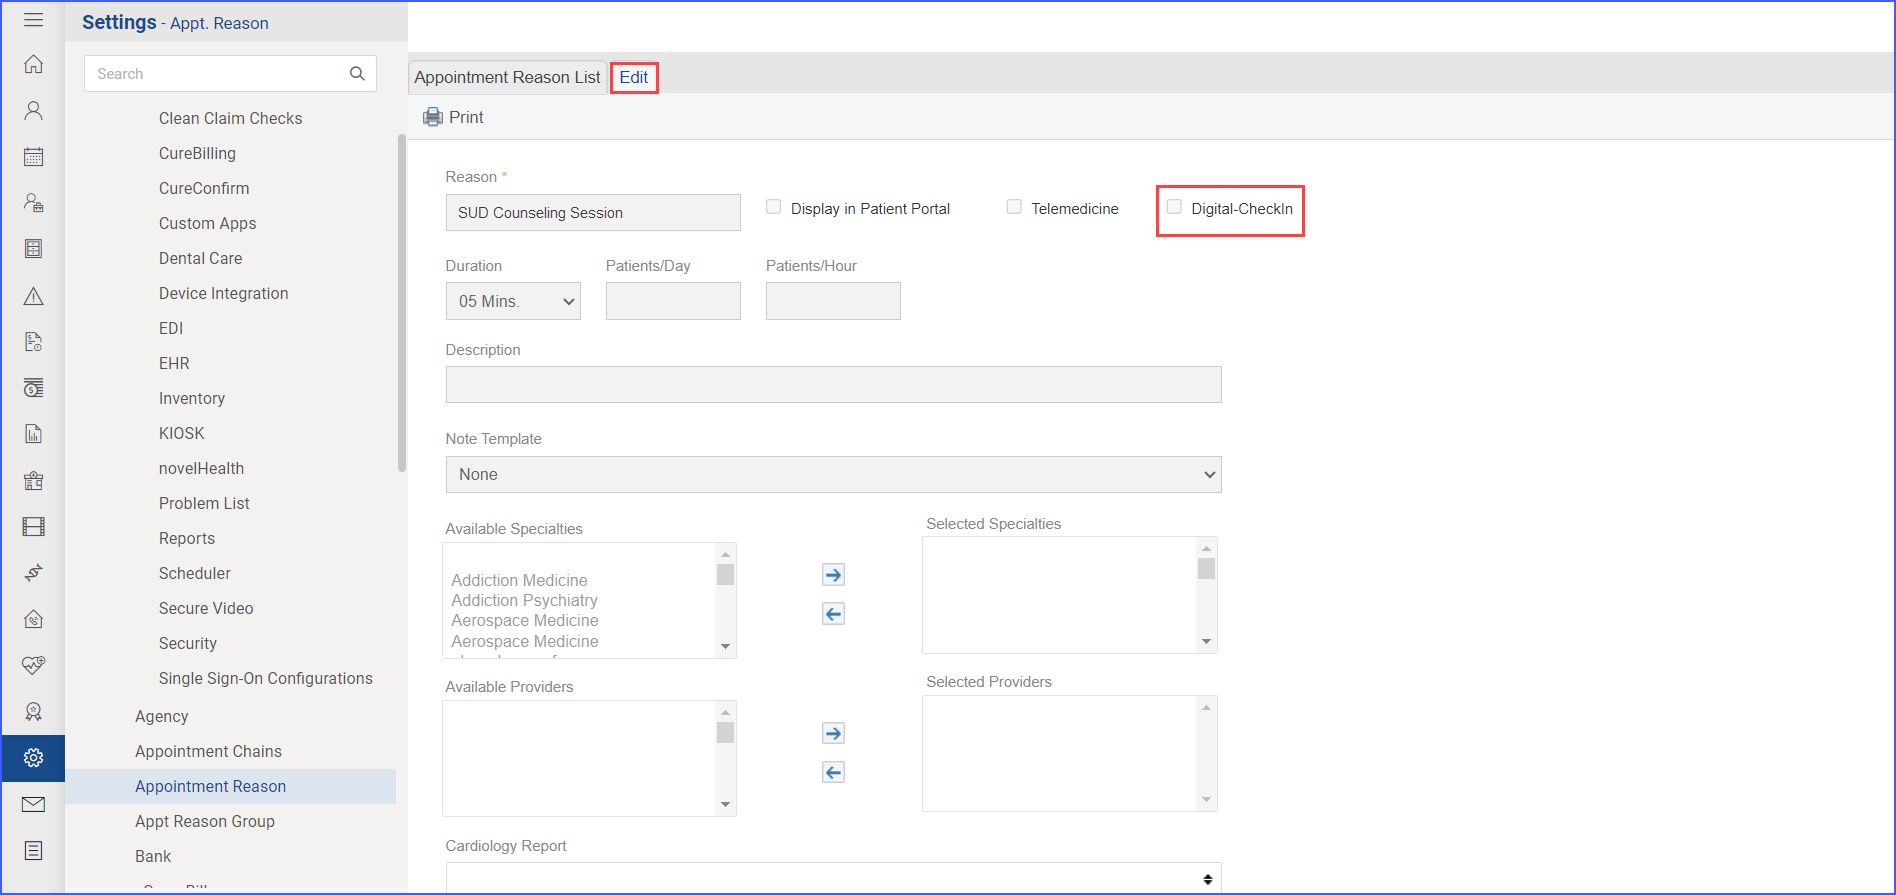
To activate DCI for a particular appointment reason, scroll down or search the desired reason from the list and click its blue hyperlink. This action opens a tab labeled ‘Edit’, offering a range of options and fields for modifying the appointment reason.
Adjacent to the ‘Reason’ field at the top, there is a checkbox to activate ‘Digital Check In’. Simply mark the checkbox and proceed to click ‘Save’.
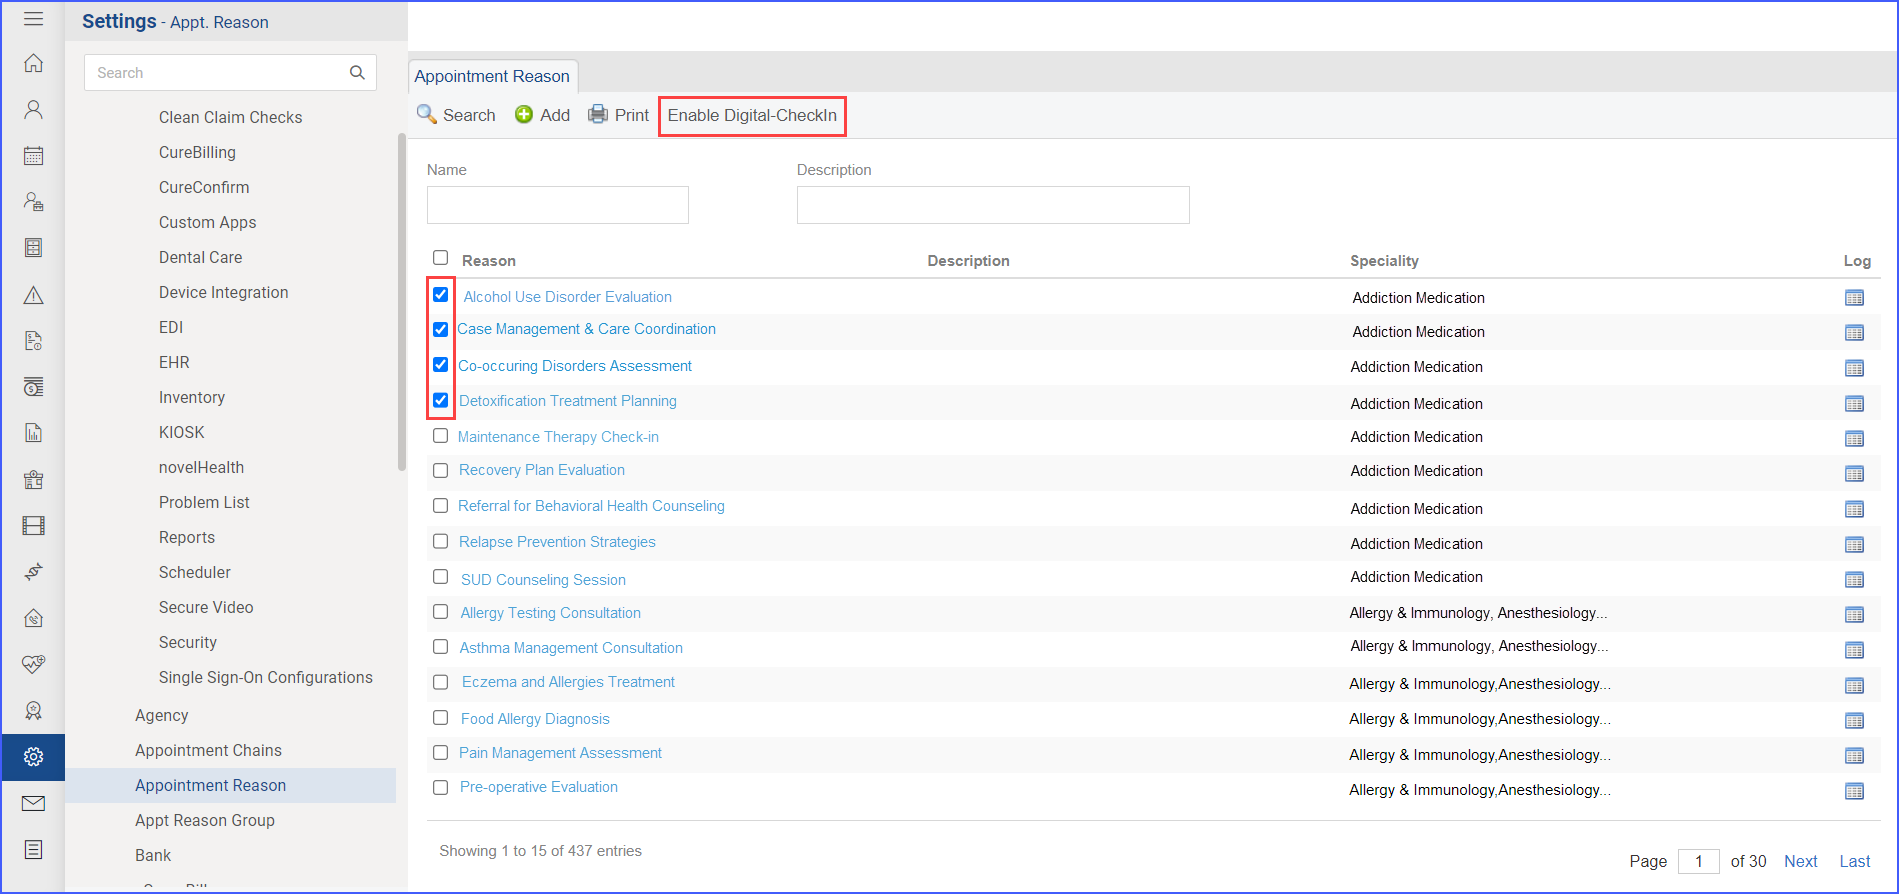
To activate digital check-in for several appointment reasons simultaneously, go to the ‘Appointment Reason’ tab and tick the checkbox besides the hyperlink of each preferred reason. Doing so introduces a button labeled ‘Enable Digital Check-In’ alongside the ‘Print’ button at the top of the page. Click this button to enable digital check in for the selected appointment reasons.
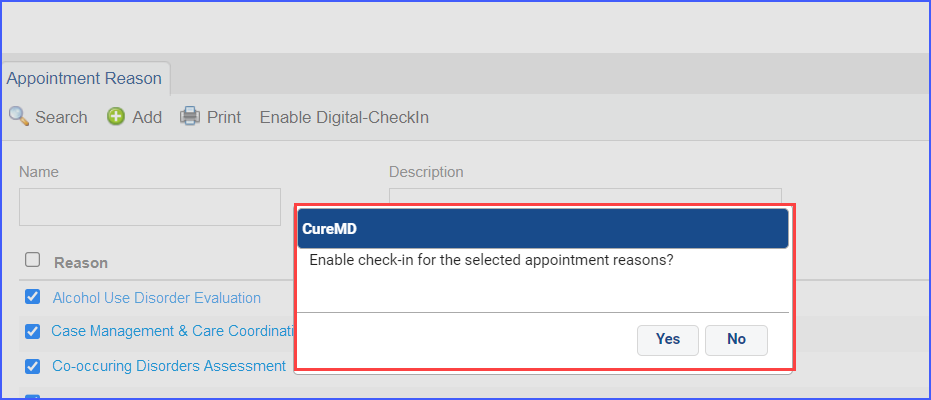
Doing so displays a verification prompt asking if the user wants to enable the digital check-in. Click ‘Yes’ and the feature is thus enabled.
Digital Check-in through novelHealth
Digital Check-in can also be enabled from the novelHealth application. Simply navigate to Settings and click Users.
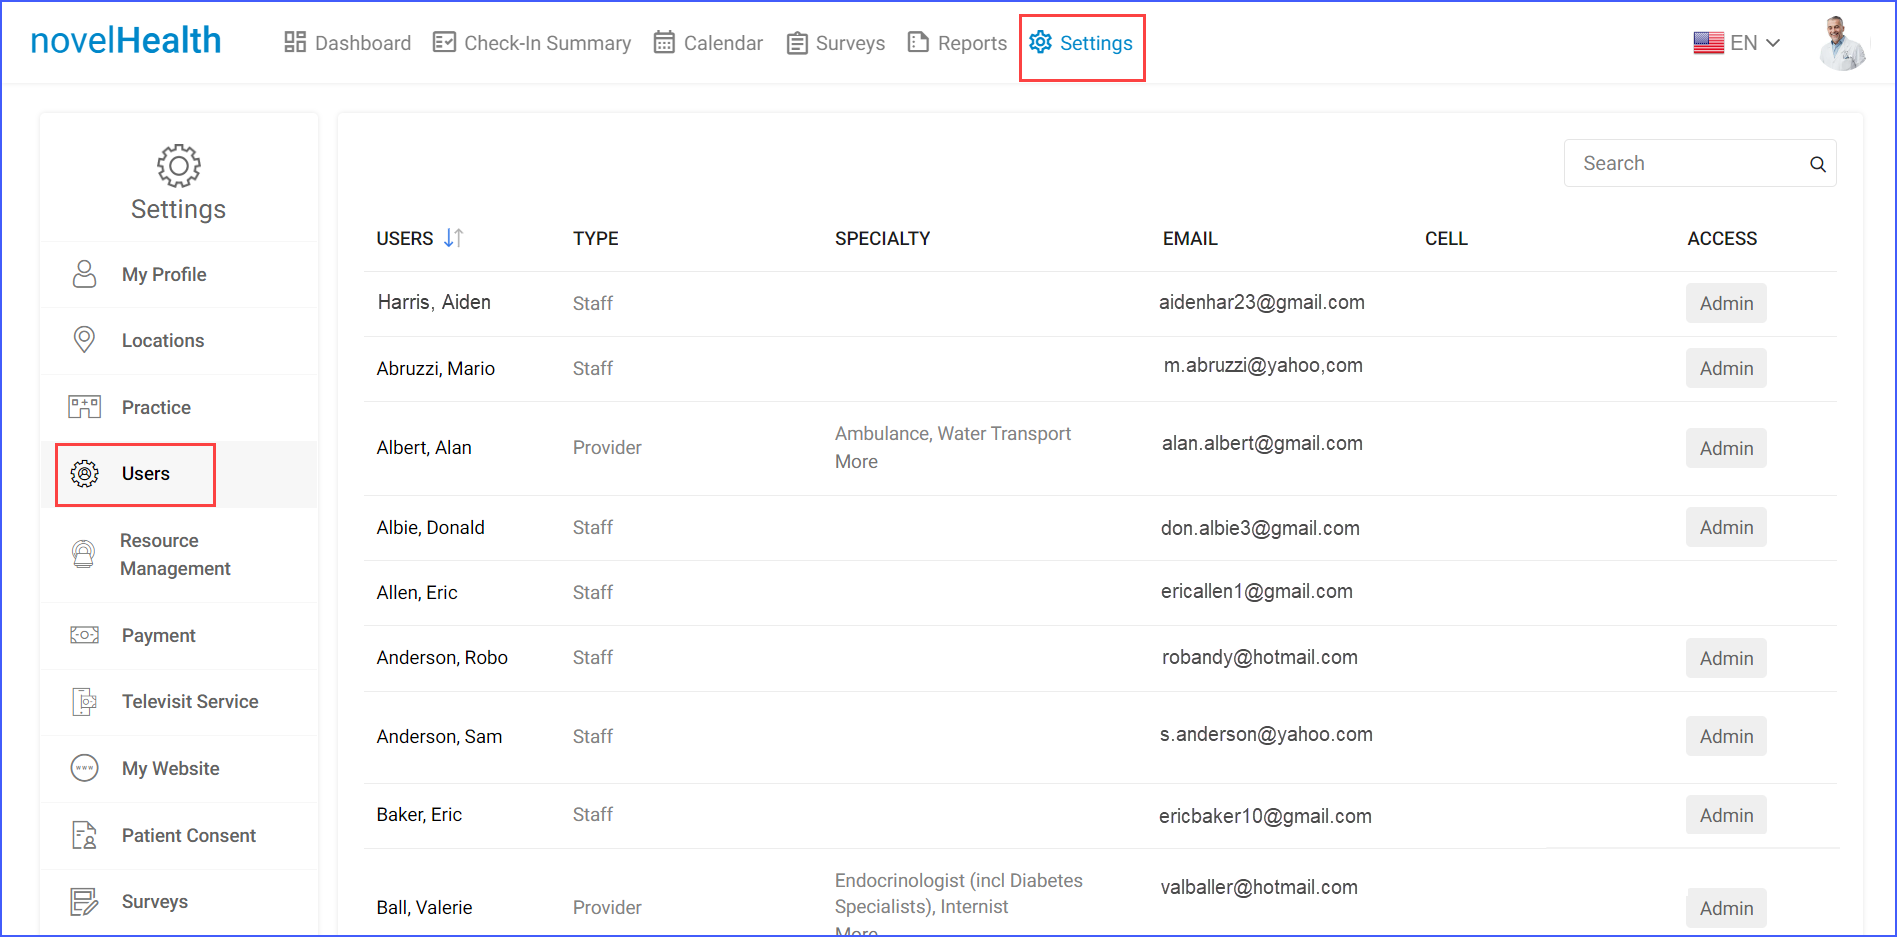
From here, select the profile of a particular provider by clicking on their name listed in the ‘USERS’ column. Once the profile is open, navigate to the top of the page and click on ‘Account’.
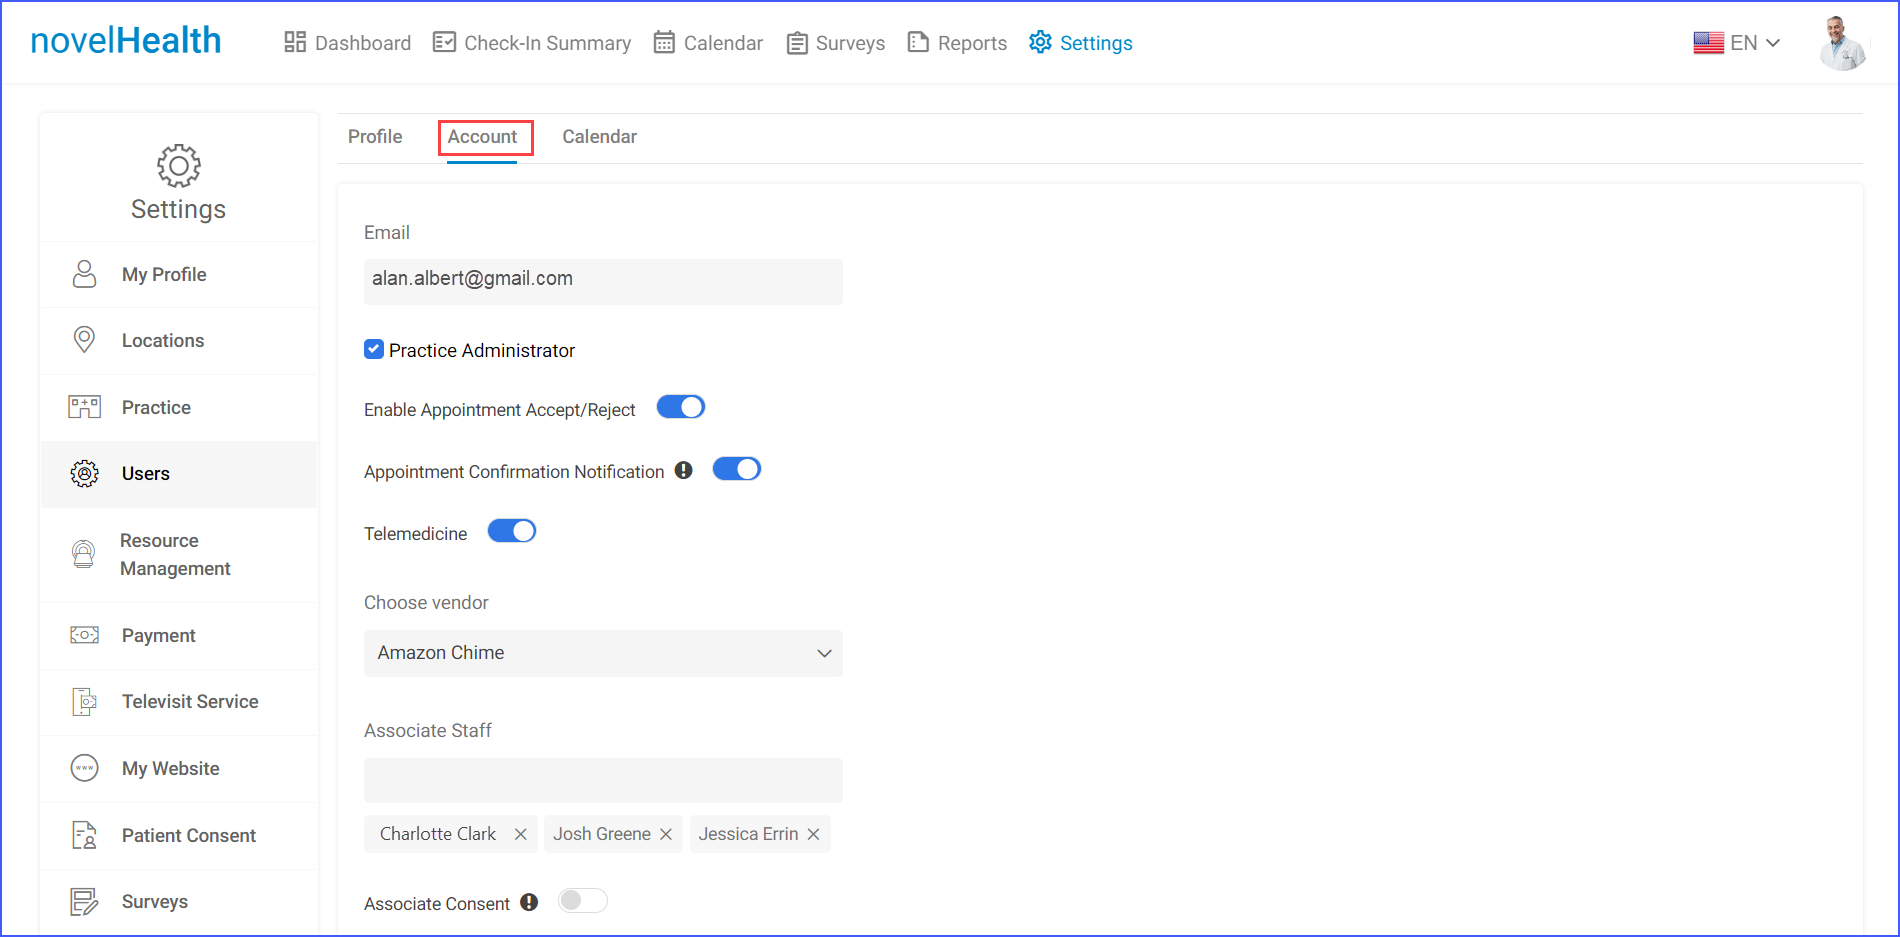
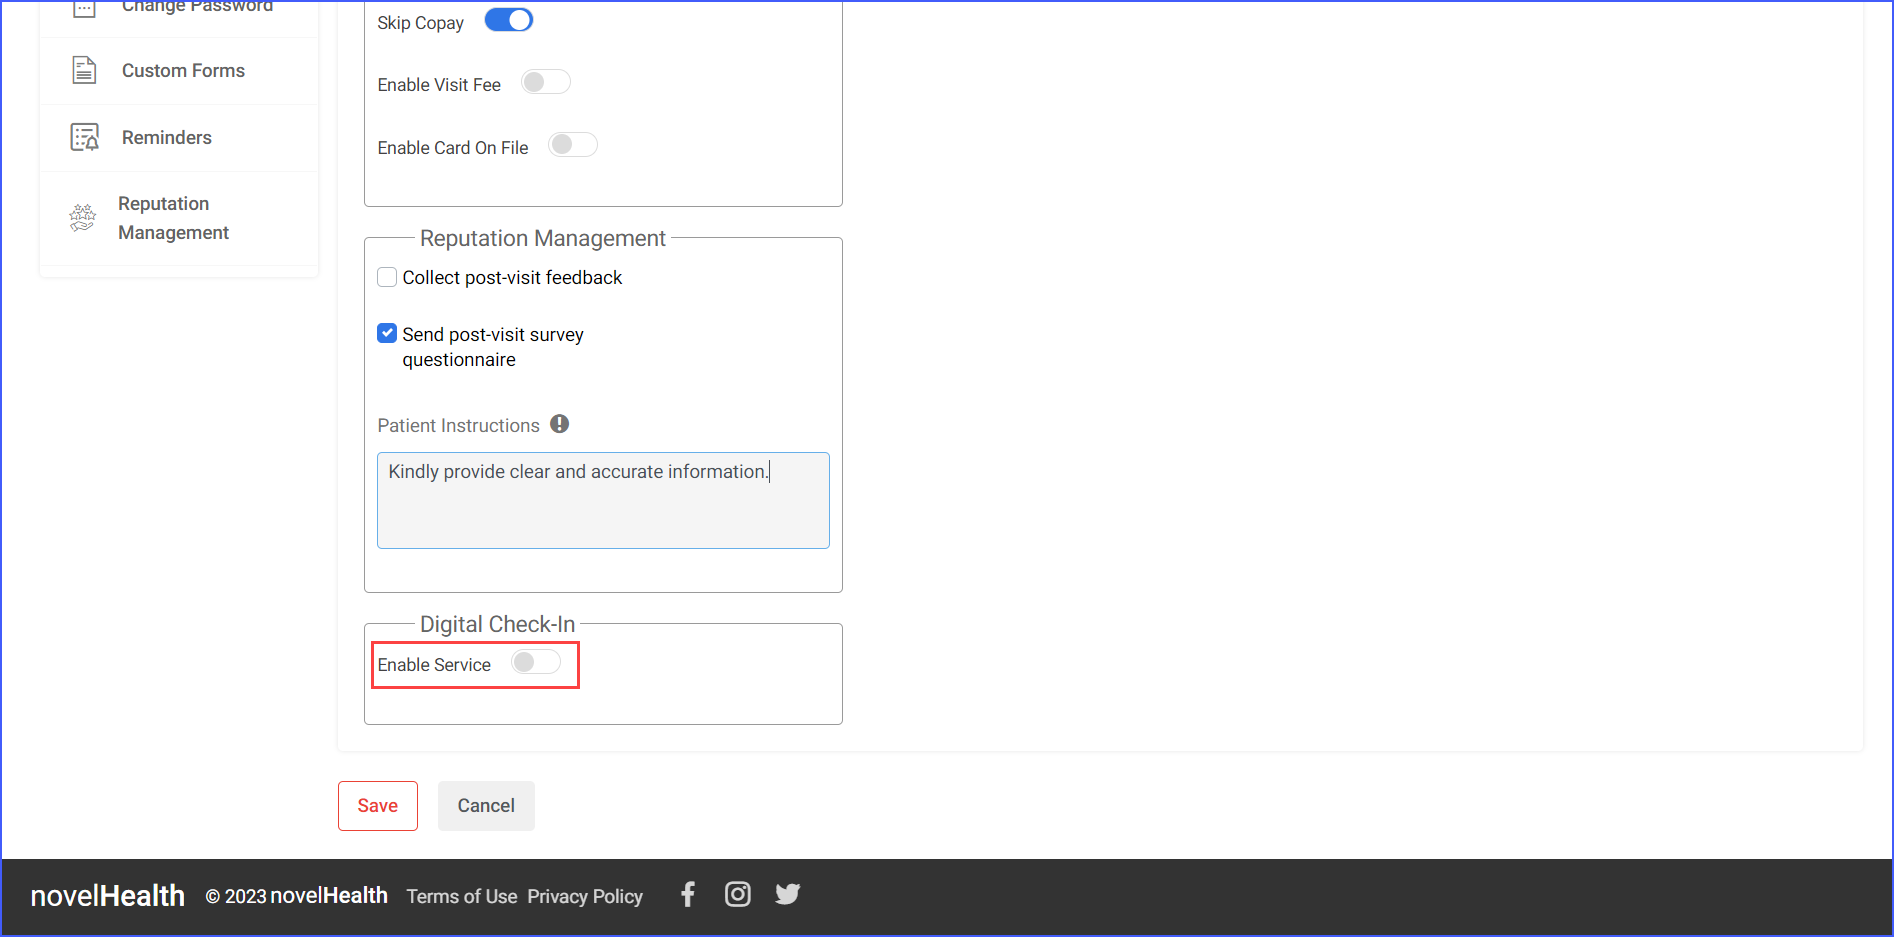
Scroll down to the section labeled ‘Digital Check-In’ and toggle on the ‘Enable Service’ option.
Note: This permission is only available to those users who are Providers.
Enabling this toggle further displays the following checkboxes related to digital check-in:
- Make check-in available at the time of booking: This means that when a patient schedules an appointment, they can also complete the check-in process.
- Enable Payment Collection
- Enable Copay Collection
- Enable Outstanding Balance Collection: Option to collect any unpaid balances or fees from a patient for previous visits or services.
- Enable Deductible Collection
- Enable Clinical History
- Allergies
- Medications
- Limit accepted insurance plans: This limits the patients’ selection of insurance plans during the check in procedure. This feature works together with the option on the providers profile to add a list of insurances, so if this checkbox is enabled, only the list supplied by the provider populates in the drop-down menu when the patient is checking in.

- Disable insurance
- Allow skipping insurance card images
- Allow patients to update insurance
- Limit accepted insurance plans
- Allow staff approved entry
- Ask patient to add emergency contact
- Ask patient to upload government-issued ID
- Allow skipping attachment upload
- Ask patient for preferred pharmacy
- Allow skipping selection of preferred pharmacy
- Allow patient to cancel appointment
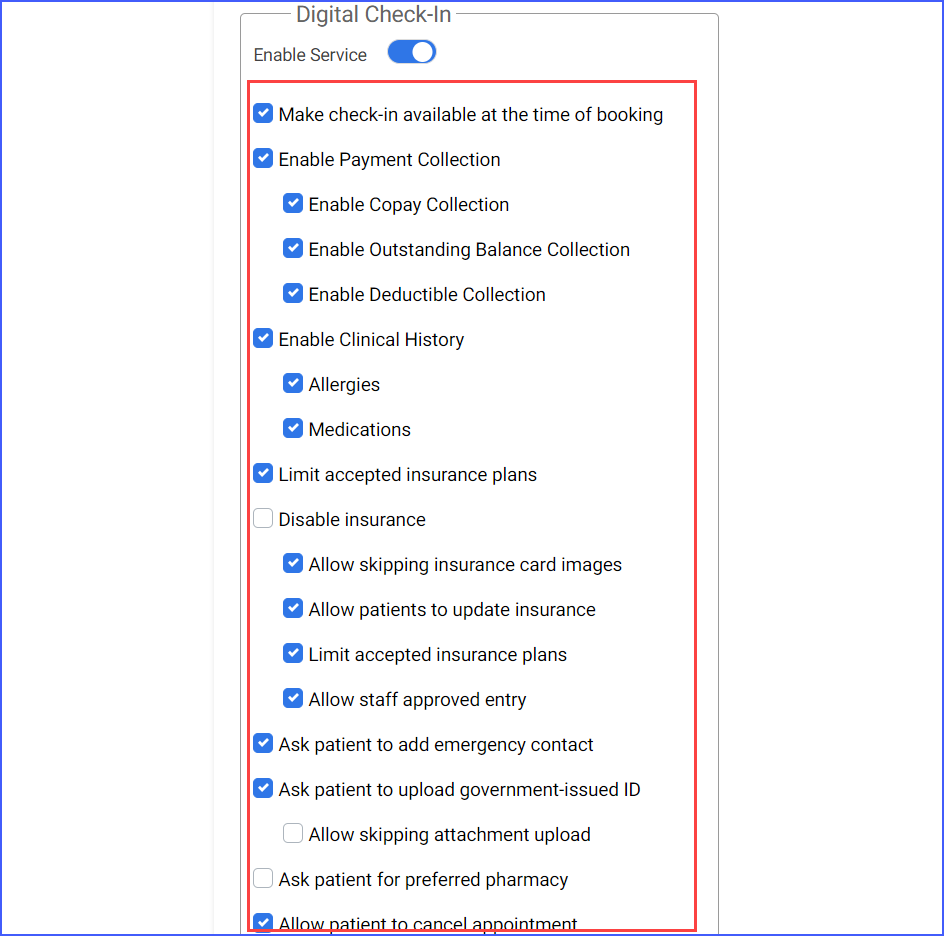
All these checkboxes can be individually selected and deselected to customize the digital check-in process as needed.
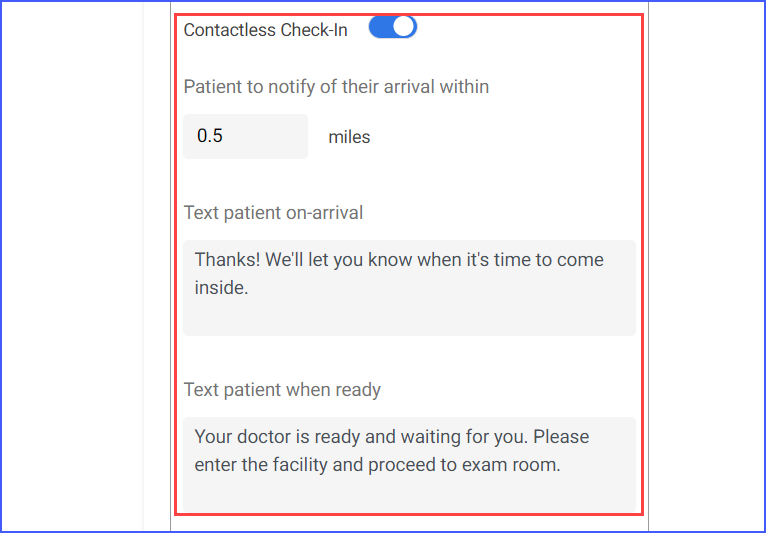
A toggle for allowing ‘Contactless Check-In’ is also available. Enabling this toggle displays the following options:
- A field to specify the distance from the provider’s practice at which the patient is to notify of their arrival. This reduces the in person wait time.
- A text-box to write down the text a patient would receive upon their arrival at the practice.
- A text-box to write down the text a patient would receive when the doctor is ready to see them.
Furthermore, there is a toggle that allows providers to record any essential visit instructions to be sent to patients after they have checked in.
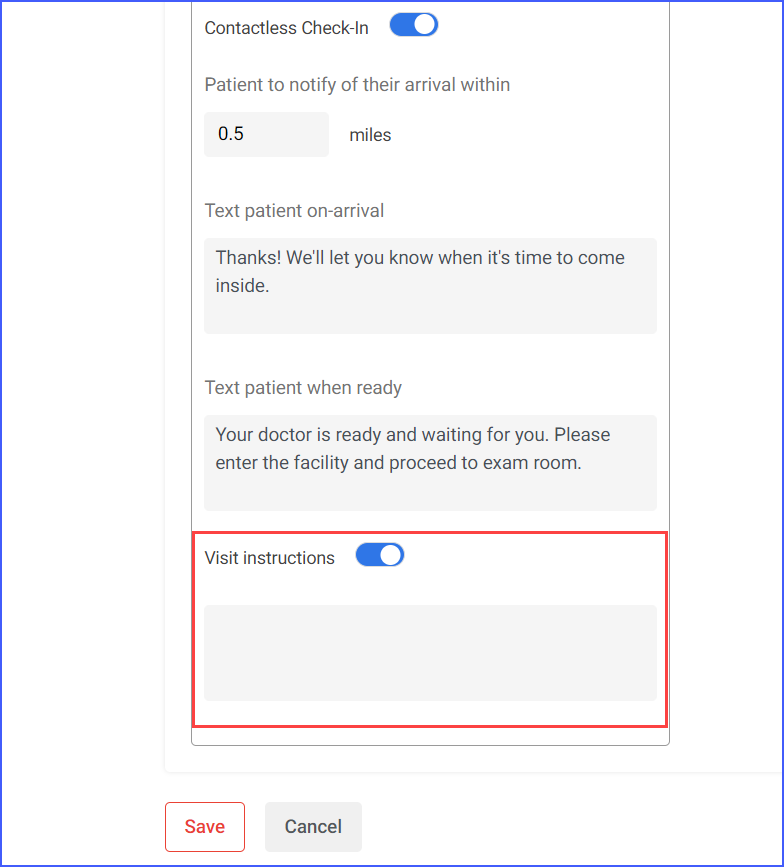
Once all necessary customizations are made, click ‘Save’.
Calendar
Calendars serve as a crucial link between a provider and their designated location. Within this section of User Settings are all the calendars associated with a provider’s schedule, imported directly from the 10g application. To adjust each individual calendar, simply click on the calendar’s name. This action leads to the ‘Edit Calendar’ page.
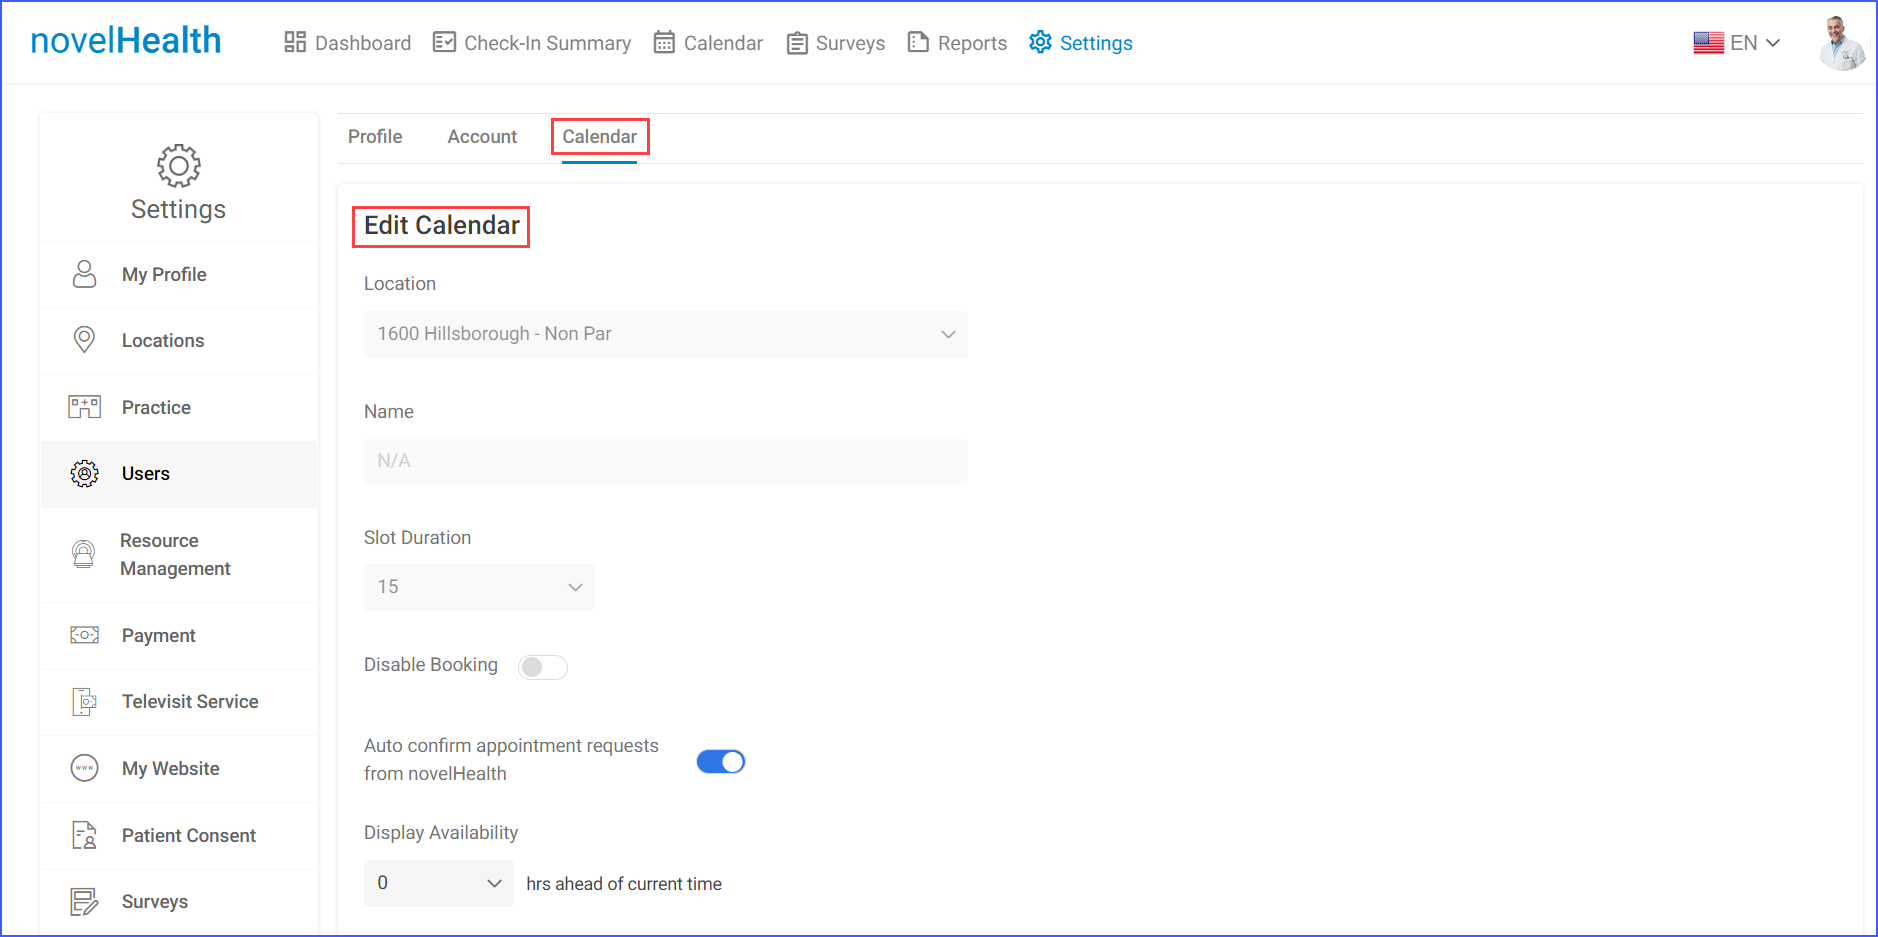
Here, several options related to digital check-in are available for providers to customize their services:
- Disable Booking Toggle:
Enable or disable the ability to book appointments on this calendar.
- ‘Autoconfirm appointment requests from novelHealth’ toggle:
Allows users to choose whether appointment requests are automatically confirmed by novelHealth or managed manually by the provider.
- When enabled, all appointment requests are automatically confirmed by novelHealth.
- When disabled, users can manually respond to each request from the ‘Requests’ tab on the page’s header. This is called the ‘Accept Reject’ feature. To utilize this feature, both the ‘Autoconfirm appointment requests from novelHealth’ toggle and ‘Enable Appointment Accept/Reject’ toggle must be used in unison. (Refer to the next heading to learn how to do this)
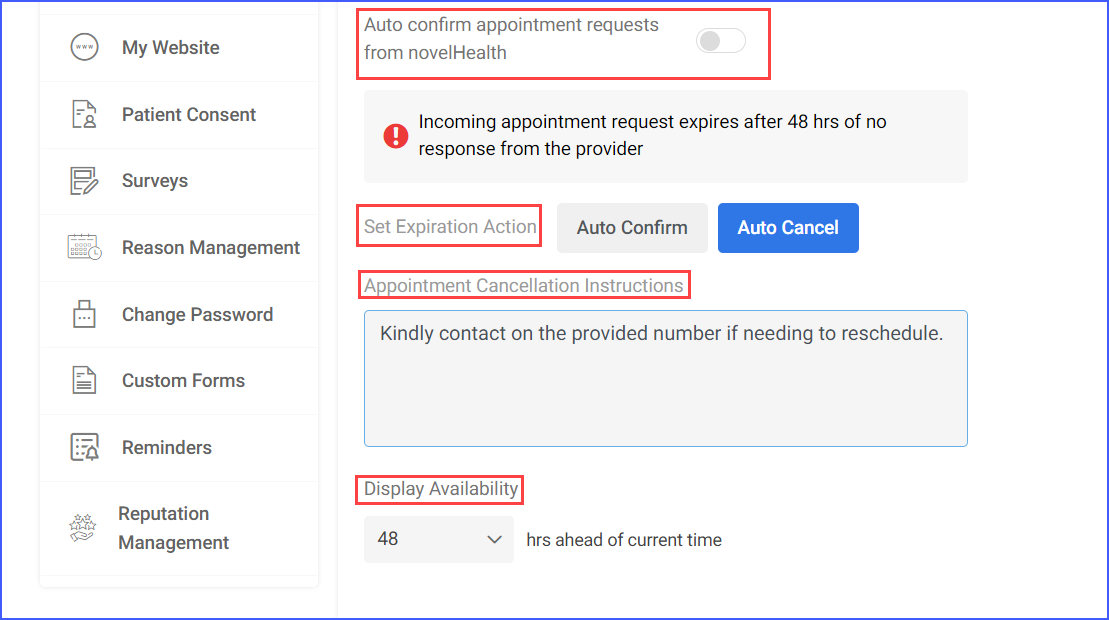
- If users are unable to respond within a specified time period, requests will either be automatically approved or declined, depending on the option chosen from the ‘Set Expiration Action’ field.
- The duration for manual response to an appointment request can be set via the ‘Display Availability’ drop-down.
- The action upon expiration can be selected using the ‘Set Expiration Action’ buttons. Choose between Auto Confirm or Auto Cancel – requests will be confirmed or cancelled respectively after the set expiration time.
- There is also an option to provide instructions for automatic cancellations in the ‘Appointment Cancellation Instructions’ text field.
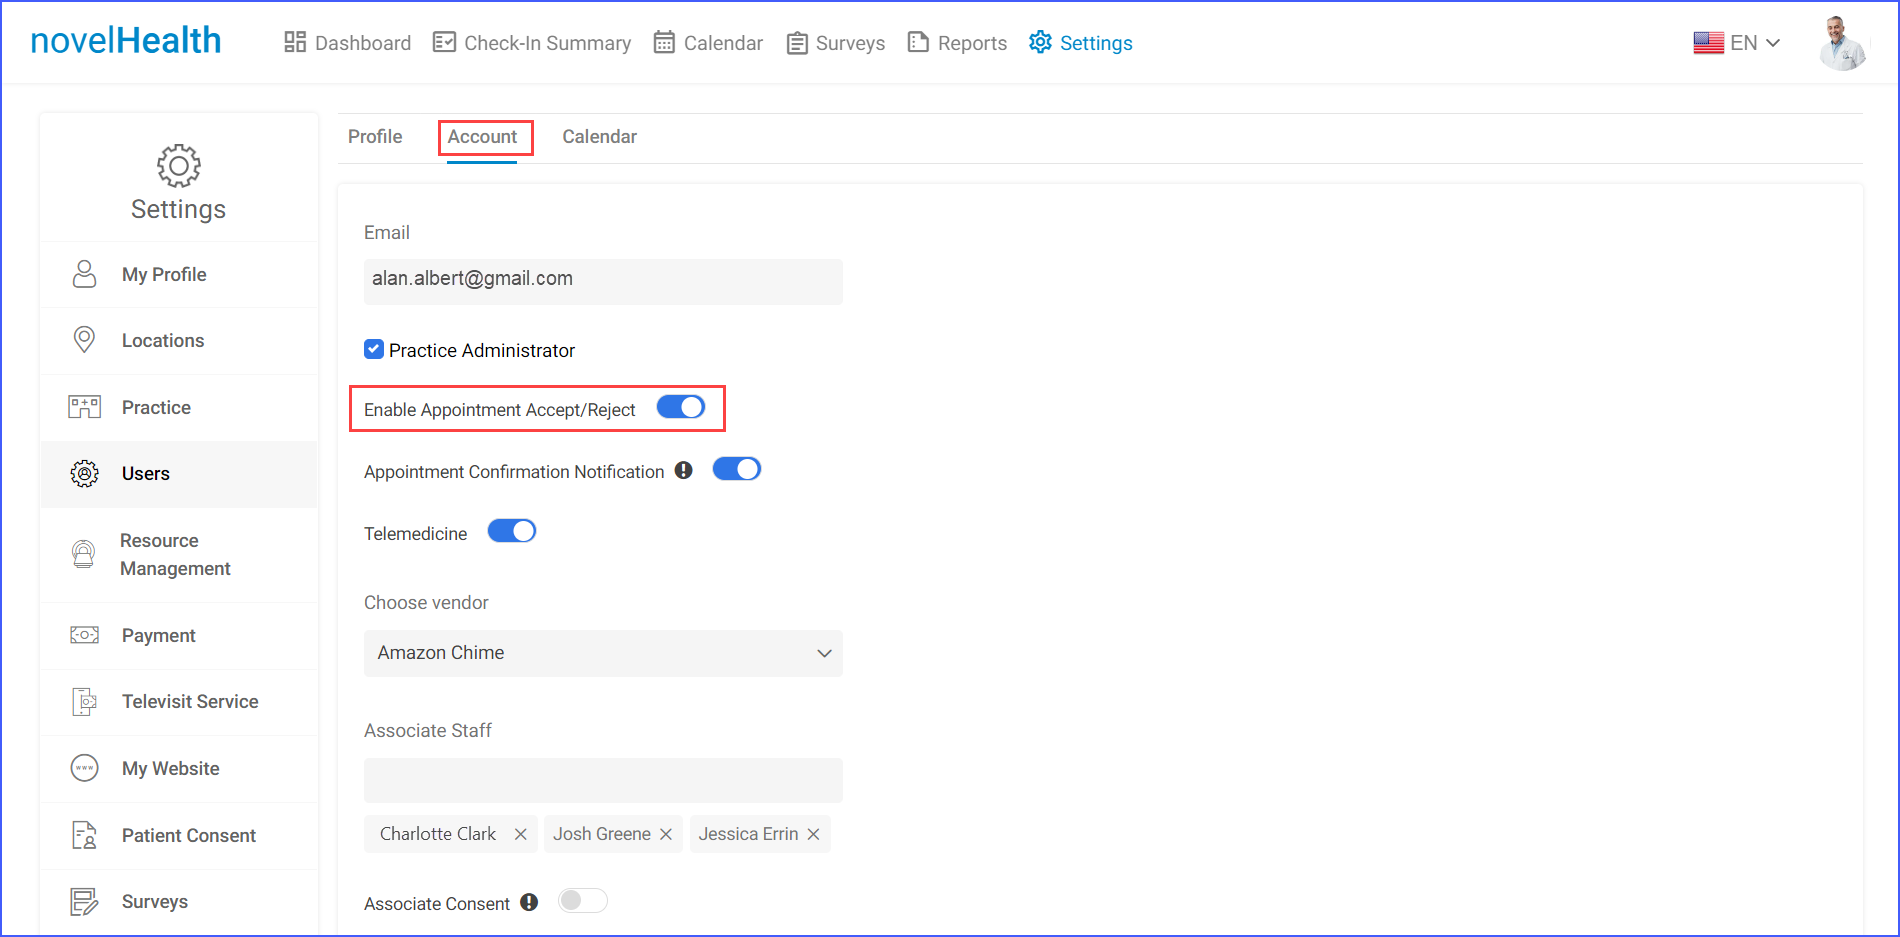
How to utilize the ‘Accept/Reject’ feature?
- Navigate to the ‘Account’ tab for a specific user in the ‘Users’ section. Here, turn on the ‘Enable Appointment Accept/Reject’ toggle. Once done, click ‘Save’.
- Simultaneously, turn off the ‘Auto confirm appointment requests from novelHealth’ toggle. The Display Availability field must be set according to the time needed by the provider to manually accept or reject the appointments. After this duration passes, the appointments are either automatically confirmed or automatically rejected based on the ‘Expiration Action’ chosen. Once these settings are configured, click ‘Save’.
- When this feature is enabled, a tab labeled ‘Requests’ appears at the top of the page. Providers can use this tab to manually respond to each appointment request.
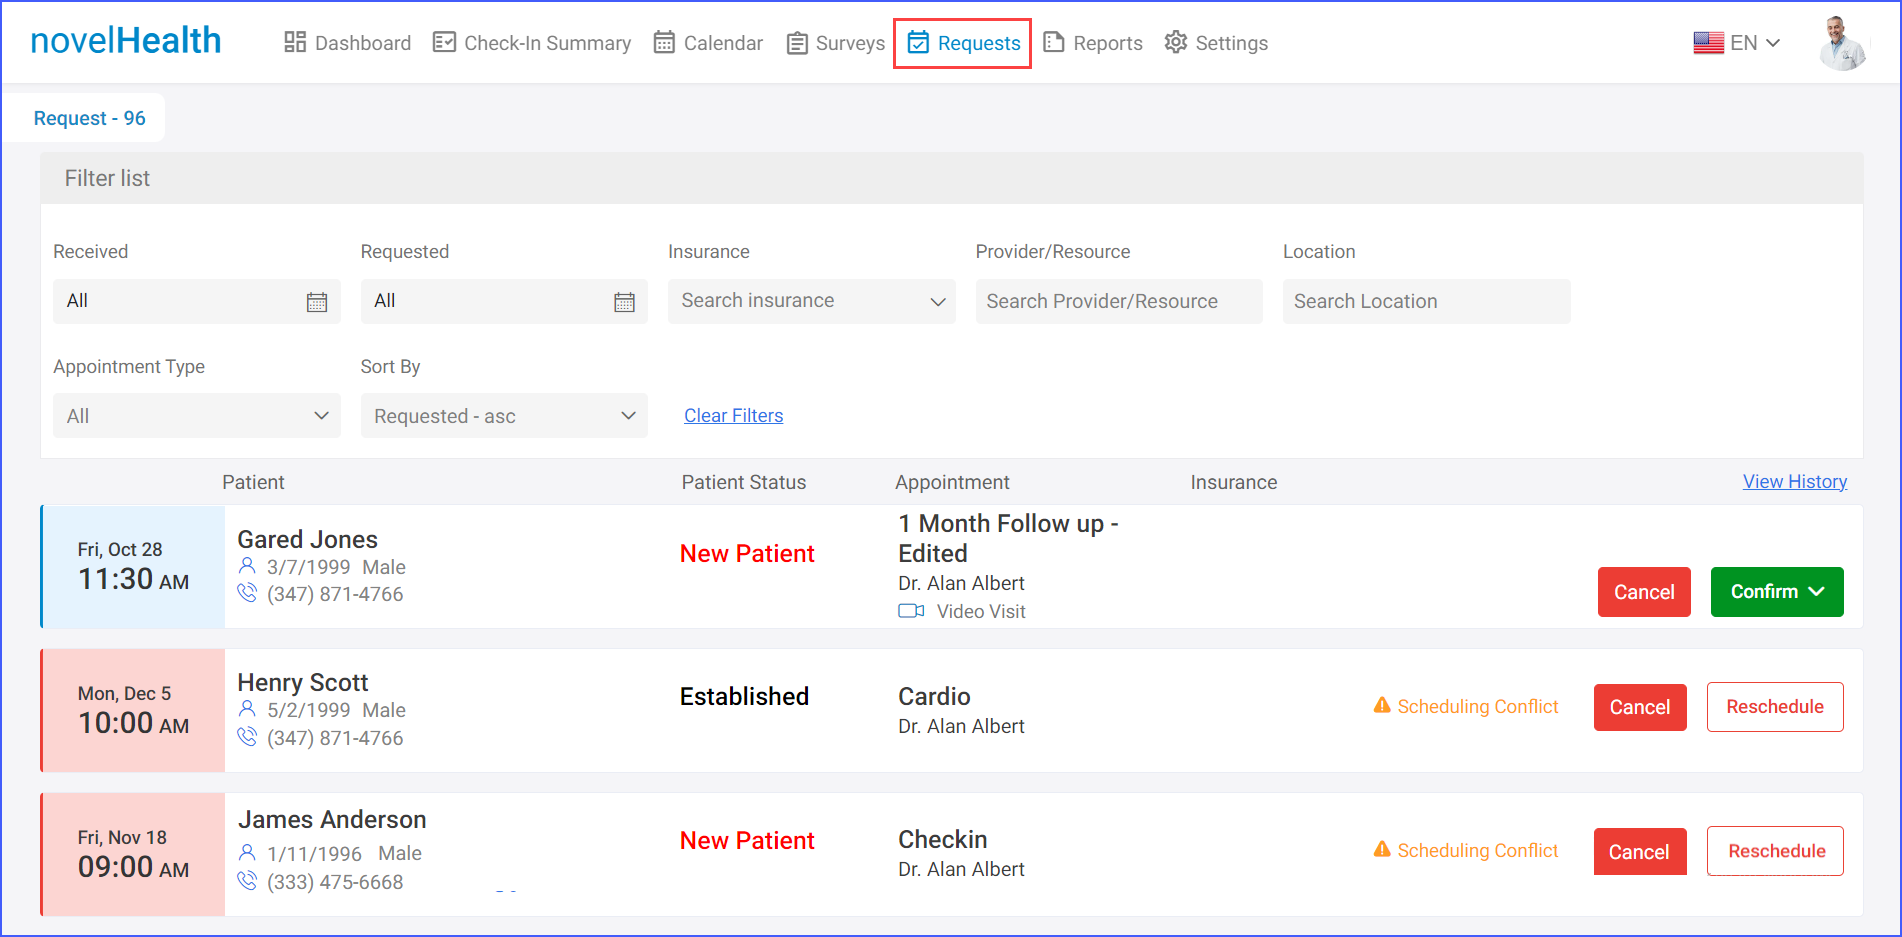
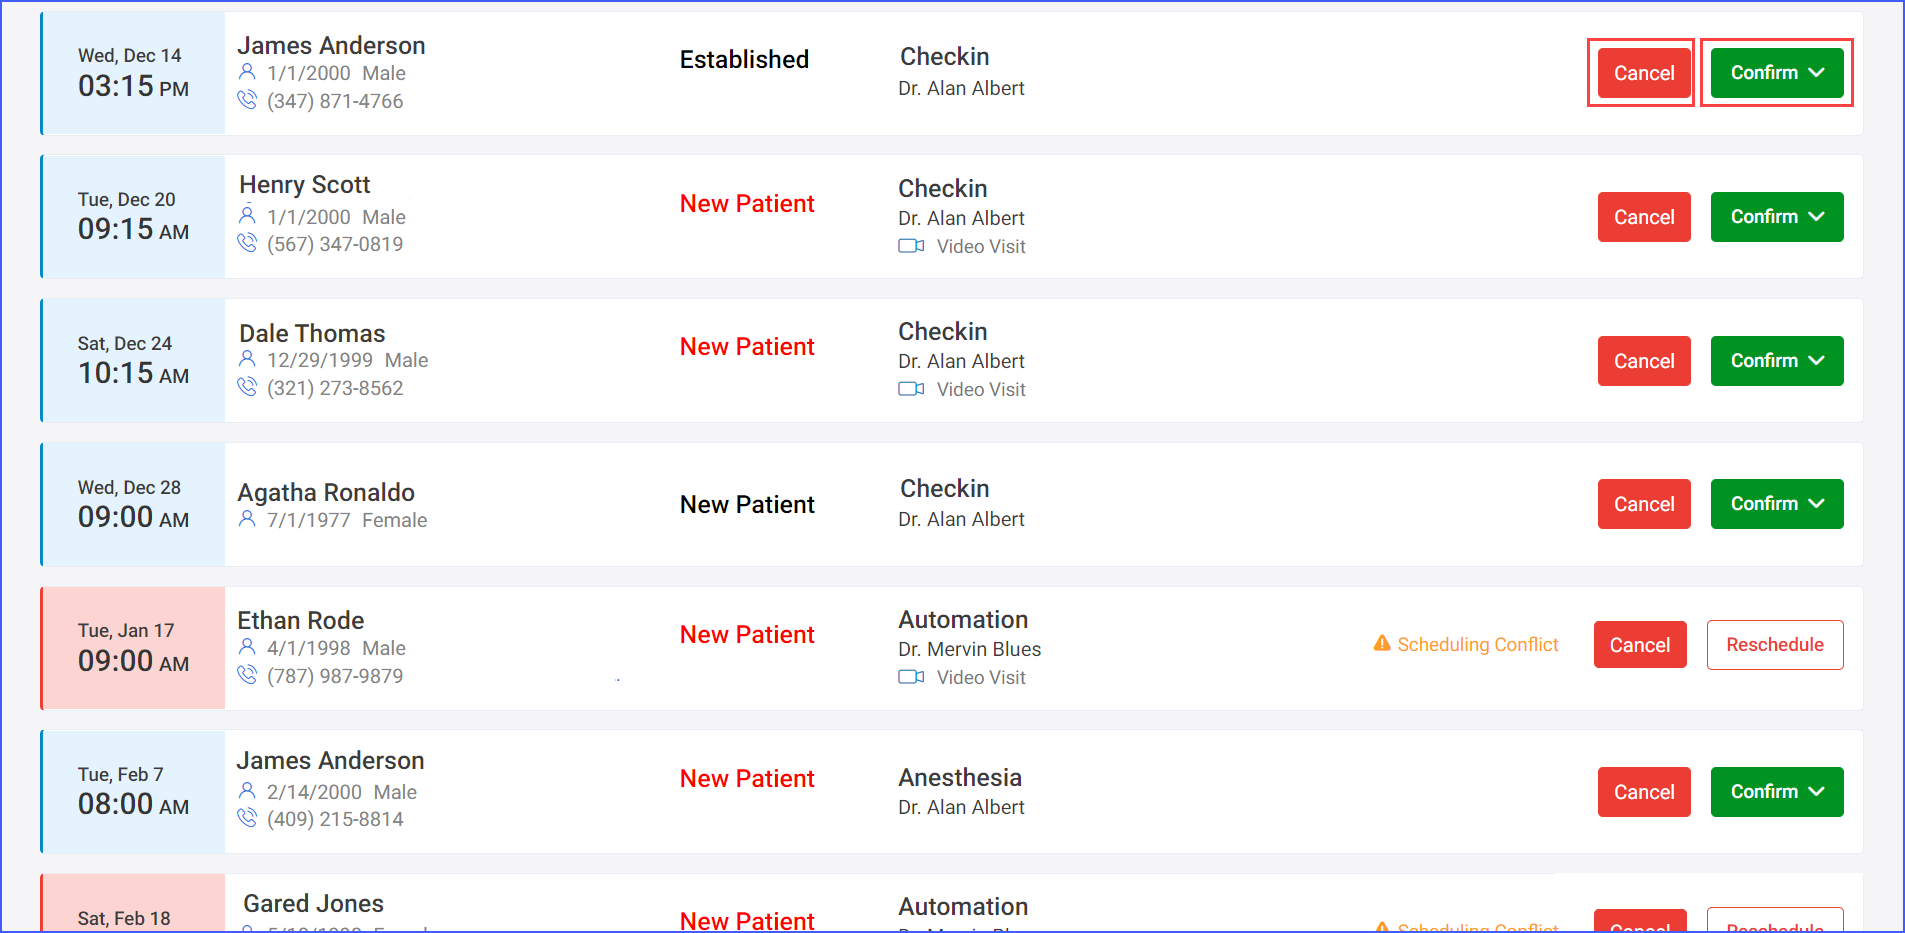
- Appointments can either be ‘Cancelled’ or ‘Confirmed’ by simply clicking the respective buttons.
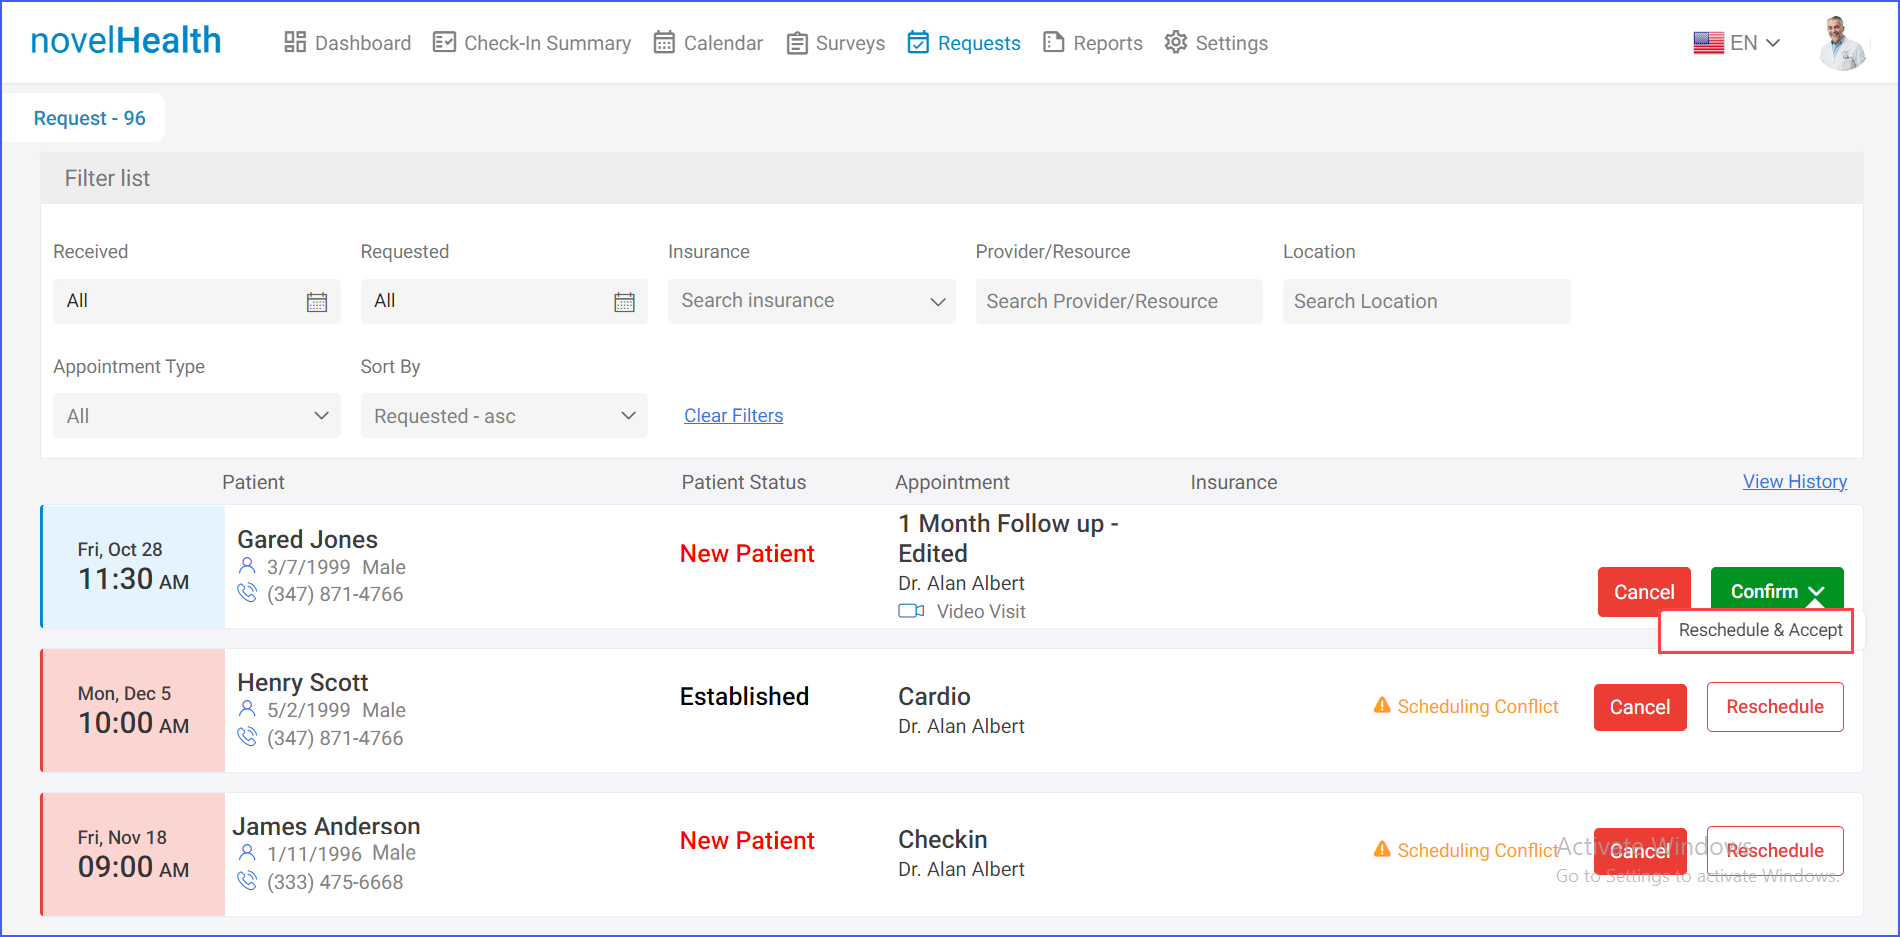
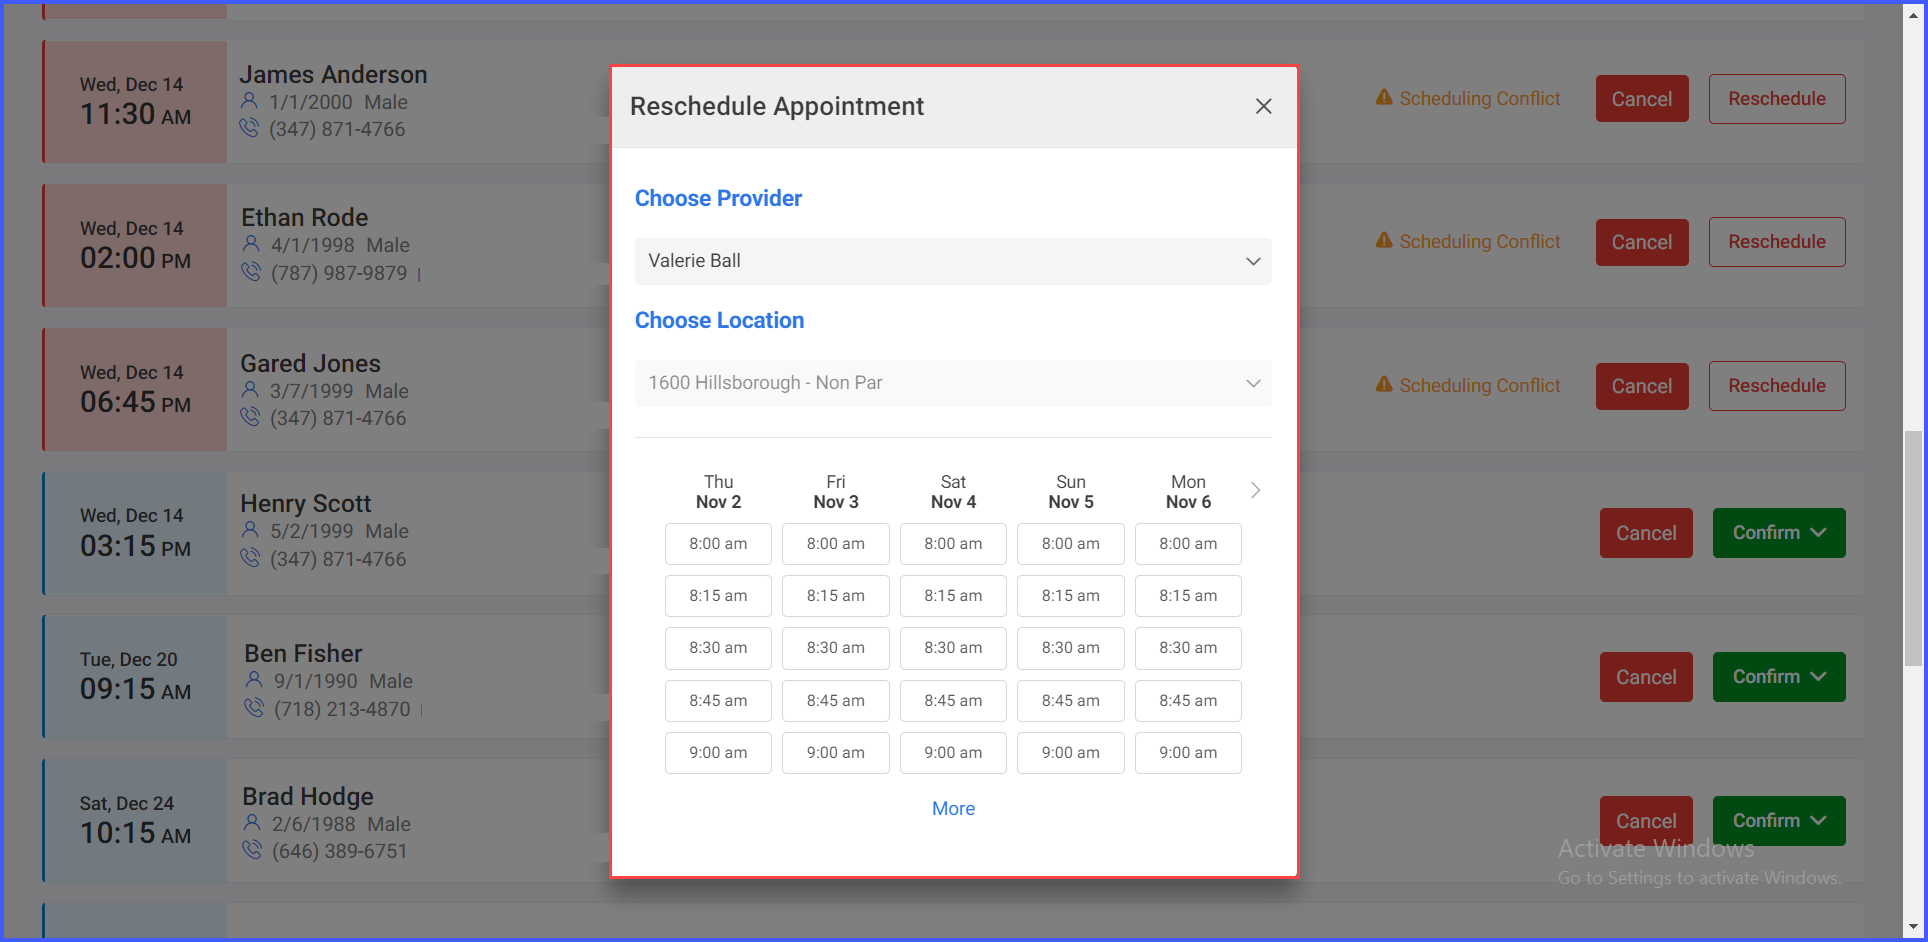
- Furthermore, there is an option to click the downward arrow next to the ‘Confirm’ button in order to ‘Reschedule & Accept’ an appointment. Selecting this option displays a ‘Reschedule Appointment’ window from where the Provider, Location and Date for the rescheduled appointment can be chosen.
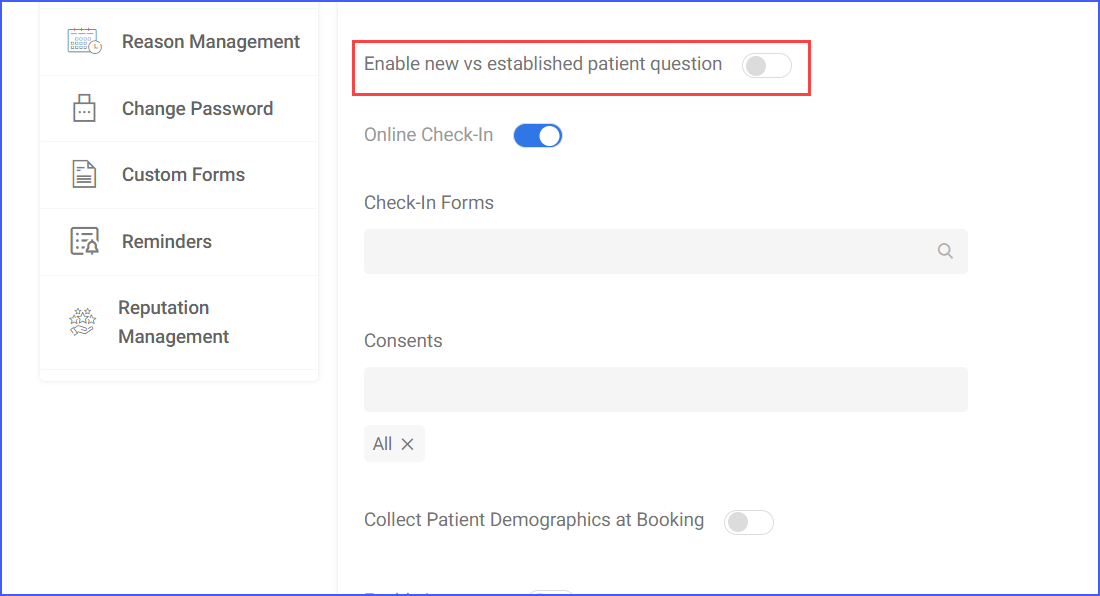
3. ‘Enable new vs old patient question’ toggle:
This toggle helps providers confirm if the person booking the appointment is a new or returning patient.
Note: If the ‘Autoconfirm Appointment Requests from novelHealth’ toggle is disabled, this toggle is automatically enabled. This ensures providers have necessary information for manual responses and their decisions are more informed if they know whether a patient is new or returning.
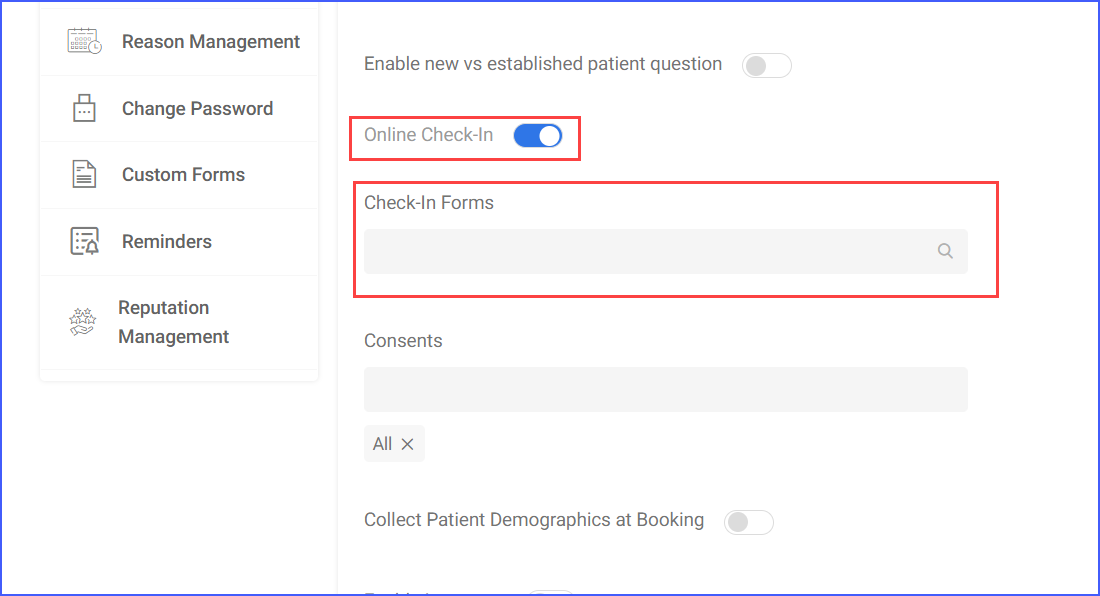
4. Online Check In toggle:
When activated, gives the option to enable online check-in for a specific calendar associated with a location. Enabling it displays a field on the page for selecting the check-in forms to be shown to patients during online check-in.
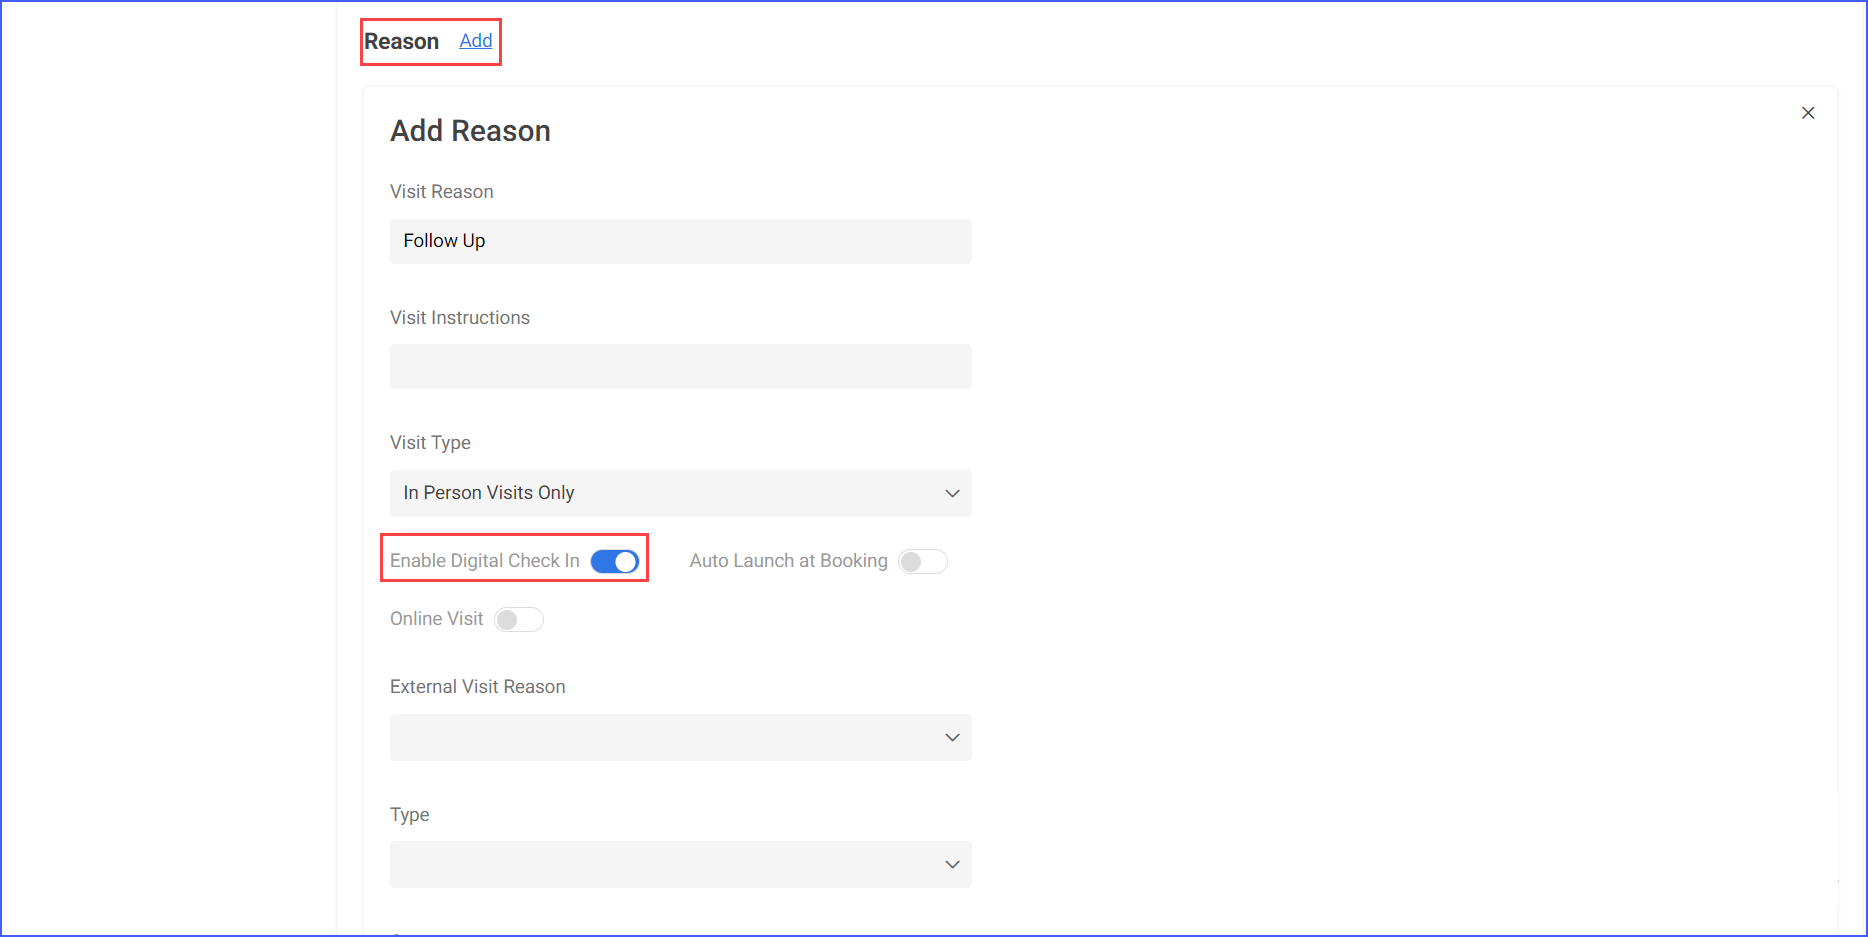
5. Reasons:
Associate visit reasons with the calendar by clicking ‘Add’. This opens an ‘Add Reason’ section with fields to specify Visit Reason, Visit Instructions, and Visit Type (in-person, video visits, or both). Additionally, a toggle is available to enable ‘Digital Check-In’ for that particular visit reason. This mandates digital check-in for patients booking appointments for the specified reason.
There is also an option to specifically curate a calendar to accommodate an appointment reason. To do so, enable the toggle for Reason Specific Calendar and either click the checkbox for ‘Regular Working Hours’ or individually set calendars for each day of the week.
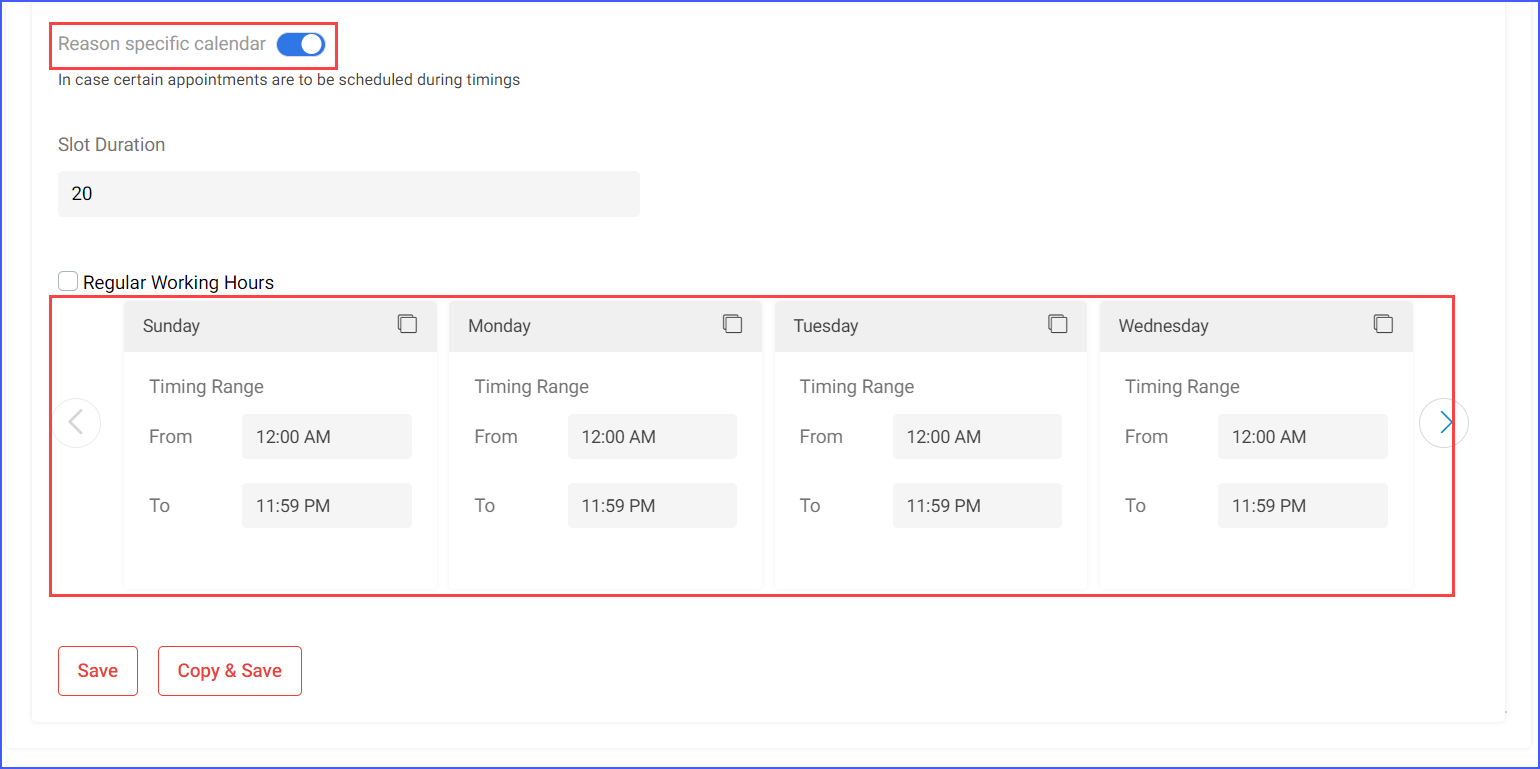
Once all of these changes and edits are made, click ‘Save’.